Integral or In-Built Themes in Excel empower users to seamlessly elevate their spreadsheet presentations with professional aesthetics. By harnessing these pre-designed themes, users can effortlessly enhance readability, visual appeal, and overall impact. Whether crafting financial reports, project proposals, or data analyses, leveraging Integral or In-Built Themes in Excel ensures a polished and cohesive final product. Unlock the full potential of your spreadsheets today, and make a lasting impression with the dynamic visual enhancements afforded by Integral or In-Built Themes in Excel. Elevate your Excel experience and captivate your audience with every presentation.
This Tutorial Covers:
- What is Excel’s Integral Theme Feature
- How to use the Integral Theme Feature in Excel
- Inserting themes in Excel Worksheet
- Customizing Themes Color
- Font Customization
- Effect Customization
- How to remove saved themes in Excel
1. What is Excel’s Integral Theme Feature?
Excel’s Integral Theme feature is a built-in functionality that allows users to change the appearance and formatting of their spreadsheets with just a few clicks. The integral themes in Excel are a collection of predefined combinations of colors, fonts, and effects that give a consistent and visually appealing look to your workbook. These themes are designed to provide a professional and polished appearance to your data, making it easier to present and analyze information. By applying an integral theme, you can quickly transform the overall design of your spreadsheet, ensuring a cohesive and visually pleasing presentation of your data.
2. How to use the Integral Theme Feature in Excel?
In Microsoft Excel, a Theme is a combination of default Colors, Fonts, and Effects that can be applied to a workbook or specific elements within it, such as Tables and Charts. Each Theme offers a unique set of Colors, Fonts, and Effects, which contribute to a consistent and professional look throughout the document. When a new Theme is selected, it replaces any existing styles in the workbook.
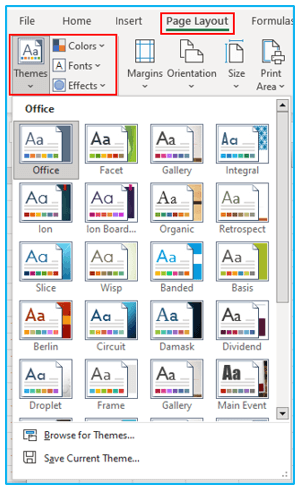
The tools for creating and customizing Themes are conveniently located in the “Page Layout” tab, within the “Themes” Group. These tools include Themes, Colors, Fonts, and Effects.
Themes: Applying Excel Themes to your workbook ensures a cohesive and visually appealing style.
Colors: By selecting a color palette, you can easily change the colors used in your document.
Fonts: The Font tool allows you to choose a font set, which will modify the text appearance throughout your workbook.
Effects: This tool alters the visual effects applied to objects within the workbook, providing additional stylistic options.
Hovering over the Theme’s tools in the Themes Group offers a preview of how they will affect the appearance of your worksheet.
By utilizing these Theme features, you can enhance the visual appeal and consistency of your Excel workbooks, ensuring a professional and polished look.
Now, let’s explore how to insert themes, how to customize themes’ colors, how to customize fonts, and effects in the next part.
-
Inserting themes in Excel Worksheet:
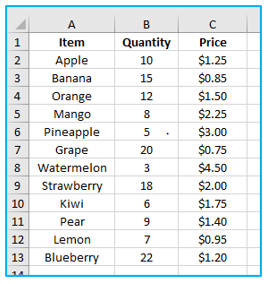
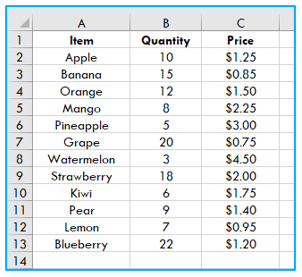
Ensure that your data is organized in a table format and that the style is set to “Normal” for optimal results. This ensures that the Theme Palettes will be visible and properly applied to your worksheet.
The steps to insert themes in Excel workbook are described below:
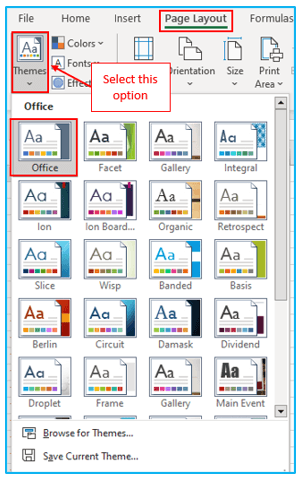
Step 1: Open your workbook and navigate to the desired worksheet.
Select the “Page Layout” tab located at the top of the Excel interface.
In the “Themes” group, click on the “Themes” icon. This will open a drop-down menu displaying a collection of themes available in Excel’s theme gallery.
By default, the “Office” theme will be selected.
Step 2: You can choose a different theme according to your preference. For example, select the “Integral” theme from the list.
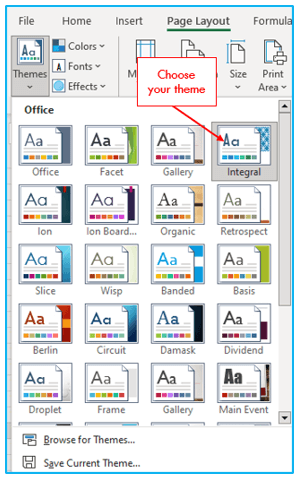
As soon as you select the desired theme, you will notice an immediate change in the colors, fonts, and font sizes used throughout your worksheet. The theme will be applied consistently across your workbook, giving it a unified and professional appearance.
-
Customizing Themes Color:
You can customize in-built themes or change them at will. Some of the significant characteristics that can be changed for prebuilt themes include colors. After that, the themes can be used in a document or saved for later.
The steps listed below can be used to modify an Excel document theme color:
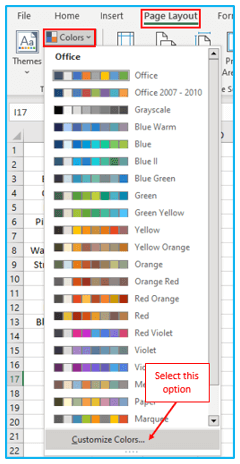
Step 1: In Excel, make sure you are on the correct worksheet. Using the menu bar, select the “Page Layout” tab. Select “Colors” from the menu under the “Themes” section. A list of colors for the various themes will be shown as a result. We now want to specify our own color palette.
Just below the color list as you scroll down, click “Customize colors”.
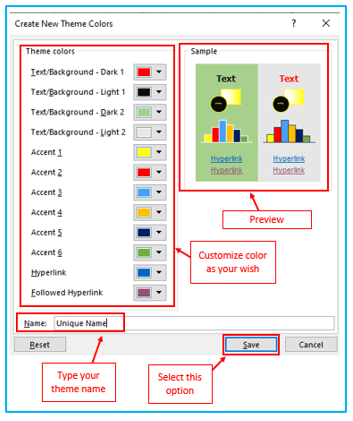
Step 2: You’ll get a “Create New Theme Color” dialog box.
Change the available color selections in the dialog dropdowns. Enter a distinct theme name in the “Name” text box down below. To save your new theme with the selected name that you created, click the “Save” button.
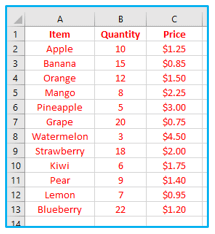
Now apply your color, and you will see your result according to your created theme. As shown below:
-
Font Customization:
In addition to modifying the colors of themes, we can also customize the fonts used in our workbook.
The steps to customize font of themes in Excel are described below:
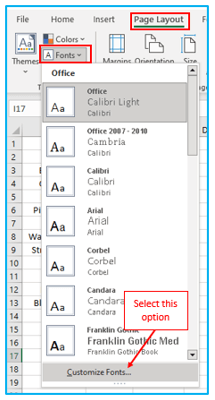
Step 1: Navigate to the “Page Layout” tab in Excel. In the “Themes” group, click on the “Fonts” option. A drop-down menu will appear. Select “Customize Fonts” from the menu.
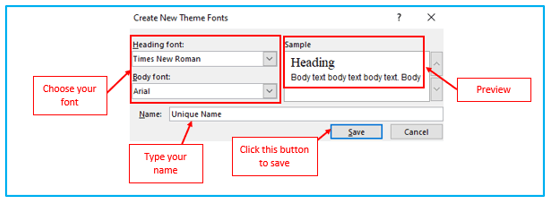
Step 2: This will open the “Create New Theme Fonts” dialog box.
Inside the dialog box, you will find the “Heading Font” dropdown. Choose a suitable font for your headings from the available options.
Similarly, locate the “Body Font” box and select a font for the body text in your workbook.
To distinguish your custom font combination, type a name for it in the “Name” box.
Once you are satisfied with your font selection and have entered a name, click the “Save” button to save your customized font combination.
By following these steps, you can easily create and save a custom font combination in Excel, allowing you to personalize the appearance of your workbook even further. Customizing fonts can add a unique touch and enhance the readability of your data.
-
Effect Customization:
Applying effects to your theme follows a similar process to other adjustments we have made in previous section.
To apply effects to your theme in Excel, follow these steps:
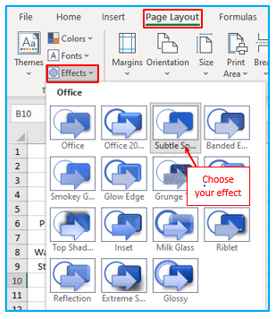
Step 1: Go to the “Page Layout” tab in Excel. Locate the “Effects” option in the “Themes” group. Click on the “Effects” button to open the effects menu.
From the available options, choose an effect that suits your preference. For example, you can select “Subtle Solid” as the effect.
As soon as you select the effect, you will notice the appearance of objects in your workbook, such as shapes and charts, change accordingly.
After applying the desired effect, it’s important to save both the current theme and your workbook to preserve the changes.
By following these steps, you can easily apply effects to your theme in Excel, adding visual enhancements to your workbook. The effects feature allows you to customize the look and feel of objects, giving your data a more dynamic and engaging presentation. Don’t forget to save your theme and workbook to ensure that the changes are retained for future use.
Once you are satisfied with the customized theme, go to the “Page Layout” tab.
In the “Themes” group, click on the “Themes” icon.
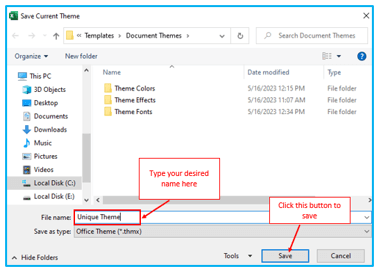
From the drop-down menu, select the “Save Current Theme” option.
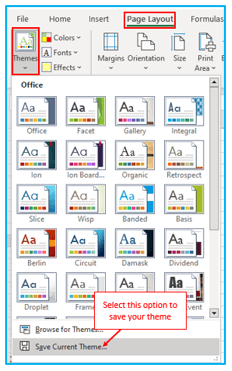
Give your desired theme name and then click on “Save” button to save your created theme.
3. How to remove saved themes in Excel?
If you want to delete an existing custom theme in Excel, you can follow these steps:
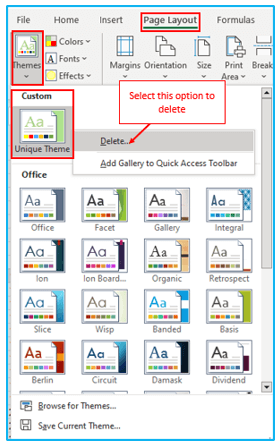
Step 1: Open the theme gallery by clicking on the “Themes” icon in the “Page Layout” tab.
Right-click on the custom theme that you wish to delete. Typically, custom themes appear at the top of the theme gallery.
From the context menu that appears, select the option labeled “Delete.”
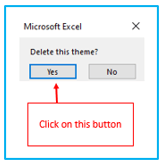
Step 2: A confirmation dialog box will appear to verify your intention to delete the custom theme. By selecting the “Yes” option, confirm the deletion.
Once the custom theme has been deleted, it will no longer be available in the theme gallery for future use.
Finally, remember to save your workbook to ensure that the changes are preserved.
By following these steps, you can easily delete any unwanted custom themes in Excel. This helps to keep your theme gallery organized and ensures that you only have the desired themes available for selection.
Application of Integral or In-Built Themes in Excel
- Streamlined Presentation: Integral or In-Built Themes in Excel offer a range of professionally designed templates, streamlining the process of creating visually appealing presentations without the need for extensive design knowledge.
- Consistent Branding: By utilizing these themes, users can maintain consistent branding across all their Excel documents, ensuring that their spreadsheets align with their organization’s visual identity.
- Time Efficiency: With ready-made themes readily available, users can save time that would otherwise be spent on manually formatting their spreadsheets, allowing them to focus on content creation and analysis.
- Enhanced Readability: Integral or In-Built Themes in Excel are designed to enhance readability by optimizing font styles, colors, and layouts, making it easier for viewers to digest complex data sets.
- Professionalism: Incorporating these themes adds a touch of professionalism to Excel documents, making them suitable for presentations to clients, stakeholders, or colleagues.
- Customization Flexibility: While pre-designed, these themes often offer customization options, allowing users to tailor the appearance of their spreadsheets to suit specific needs or preferences without starting from scratch.
For ready-to-use Dashboard Templates:
