Excel VBA TRIM Function offers a powerful solution for removing leading and trailing spaces from text strings within Excel macros. Whether you’re manipulating data, processing user inputs, or formatting text, Excel VBA TRIM Function ensures cleaner and more consistent results. Say goodbye to manual space removal and hello to efficiency with this versatile function. From enhancing data accuracy to improving the performance of your VBA code, Excel VBA TRIM Function streamlines your workflow, saving you time and effort. Take control of your text processing tasks and optimize your Excel macros with the robust capabilities of Excel VBA TRIM Function. With just a simple line of code, you can eliminate extraneous spaces, ensuring that your macros produce accurate and reliable outputs. Embrace the convenience and reliability of Excel VBA TRIM Function and elevate your VBA programming experience to new heights of productivity and accuracy.
This Tutorial Covers:
- What is VBA TRIM Function
- Syntax of the VBA TRIM function
- Why do we also need a TRIM function in VBA
- How to Use Excel VBA Trim Function
- VBA Trim Function – Example 1
- VBA Trim Function – Example 2
- Pros of Excel VBA Trim Function
- Things To Remember
1. What is VBA TRIM Function?
Excel’s TRIM string function eliminates spaces from the selected cells. The String and Text methods in VBA include the TRIM function. Worksheet functions are what this VBA procedure is. Similar to the worksheet example, one can trim or eliminate extra spaces from a string using this function. It only requires one argument, a text input, and outputs the result as a string.
-
Syntax of the VBA TRIM function:
The TRIM function has an easy-to-understand syntax:
=TRIM(text)
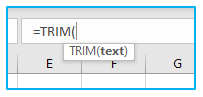
The input, “text,” can either be a text string or a variable that contains a text string.
2. Why do we also need a TRIM function in VBA?
In VBA, the TRIM function is used to remove extra spaces from a string. When we input data from different sources like user input, a file, or a database, the data may contain leading or trailing spaces that can cause errors or inconsistencies in the program. We can remove those extra spaces using the TRIM function and make the data more consistent and usable.
While Excel and some other applications may have built-in TRIM functions, it’s important to have a TRIM function in VBA as it allows us to manipulate string data within VBA code itself. VBA’s TRIM function allows us to clean up and standardize data in strings within our VBA code without relying on other applications.
Additionally, the TRIM function in VBA can be used with other string functions like LEFT, RIGHT, MID, and CONCATENATE to build more complex expressions and manipulate text data in VBA. Therefore, a TRIM function in VBA can be very useful in data processing and analysis tasks, especially when dealing with large string data sets.
3. How to Use Excel VBA TRIM Function?
The Trim function in VBA is employed to eliminate excess spaces from a string. We’ll go over the VBA Trim Function’s usage by giving some instances. They’ll be discussed in the following part.
-
VBA TRIM Function – Example 1:
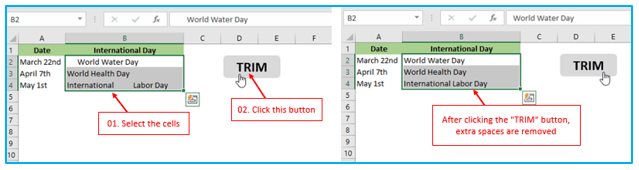
The example dataset is shown in the screenshot that follows.
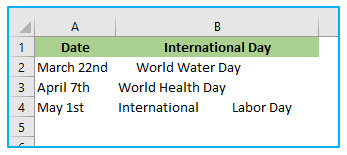
Each cell in B2, B3, and B4 has a few spaces beside each. The text in cell B2 begins with spaces. There are blank spaces in cell B3. And the text in cell B4 is separated by blank space.
The steps to use Excel VBA TRIM Function are described below:
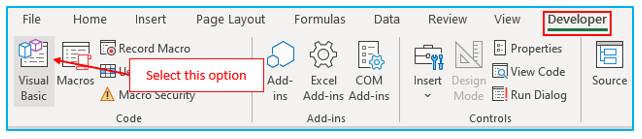
Step 1: We’ll use Excel VBA to trim these cells. For that, hit Alt + F11 simultaneously, or select “Visual Basic” from the “Developer” tab as displayed below.
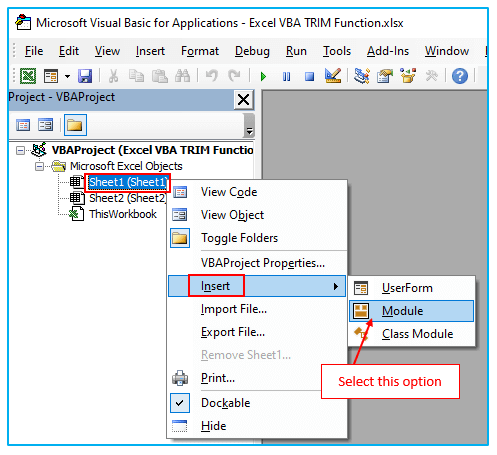
Step 2: By doing so, the “Visual Basic” writing window will open. Now pick “Module” from the “Insert” menu by right clicking on mouse in the desired sheet name, as shown below.
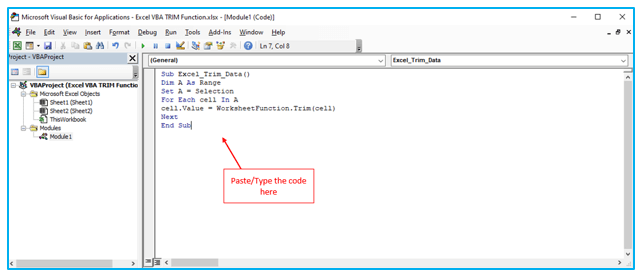
Step 3: This will produce a new Module in which we can put the trimming code. To immediately clean up this data and eliminate all leading and trailing spaces, use the following code:
Sub Excel_Trim_Data()
Dim A As Range
Set A = Selection
For Each cell In A
cell.Value = WorksheetFunction.Trim(cell)
Next
End Sub
By doing this, we finish the coding necessary to create a program using VBA Trim.
Let’s now insert the code that was generated into a tab.
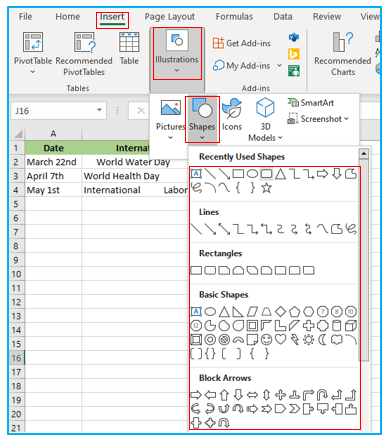
For this, pick “Shapes” from the “Illustrations” section of the “Insert” tab. Create any shape using shape formats and styles from the “Shapes” menu choice.
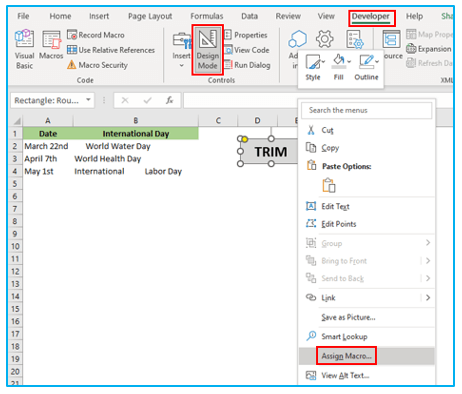
Here, as shown below, we have made a rectangular(round corner) box and given it the name “TRIM”.

Now right-click on the newly formed box or shape while still in the “Developer” menu and select “Design Mode”. To connect our created code, choose “Assign Macro” from the right-click menu selection, as shown below.
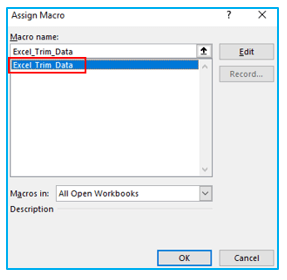
When the Assign Marco window appears, pick the previously created macro code—in this case, “Trim Data”—and then click OK.
Select the data and then pick “TRIM” from the menu. As shown below, the chosen area will be trimmed, and any unnecessary spaces will be eliminated.
-
VBA Trim Function – Example 2:
There is another way to write the VBA coding that is shown above. Only the chosen data were trimmed in the aforementioned example. This will also include inserting the function in the message window, which will display once the data has been trimmed.
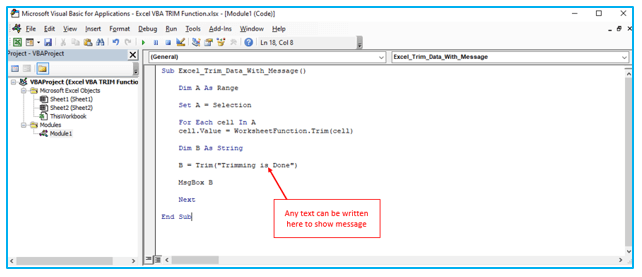
We will use the same data which we used in example 1 for this. Use the code below by following the same procedures. Now analyze the same code which we have written in example 1. However, we will put some text here in order to print a message box with text.
Sub Excel_Trim_Data_With_Message()
Dim A As Range
Set A = Selection
For Each cell In A
cell.Value = WorksheetFunction.Trim(cell)
Dim B As String
B = Trim(“Trimming is Done”)
MsgBox B
Next
End Sub
The Visual Basic windows should be closed once we have finished entering the code. Follow the same steps to assign the macro code to the “TRIM” button as shown in example 1.
By doing this, the TRIM Button will be given our trim coding. To test the data, first select it, and then hit the TRIM button.
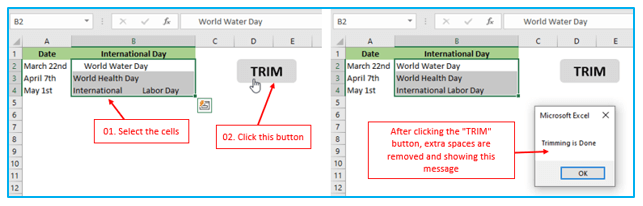
The message “Trimming is Done” can also be seen here, as can be seen above where our data was trimmed.
4. Pros of Excel VBA Trim Function:
- Without counting the number of additional spaces in the cells, we can quickly and efficiently remove enormous amounts of data.
- Trimming function coding is also fairly minimal.
- The likelihood of any additional room being saved is extremely low or nonexistent.
5. Things To Remember:
- Save the work as a Macro-Enabled Worksheet at all times. We can use the assigned macro numerous times by doing this.
- Before giving the code to any button, compile it.
- There are two distinct methods for making a button, and either one can be used depending on the needs or preferences of the user.
- Think about creating VBA code in the manner illustrated in example 2, which will also output the me.
Application of Excel VBA TRIM Function
- Data Cleansing: Utilize the Excel VBA TRIM function to clean leading and trailing spaces from text strings, ensuring data consistency and accuracy.
- User Input Validation: Validate user inputs within Excel VBA macros by trimming leading and trailing spaces, preventing data entry errors.
- String Comparison: Compare text strings accurately by removing spaces with the Excel VBA TRIM function, facilitating reliable string comparisons.
- Text Formatting: Format text output in Excel VBA macros by trimming spaces from generated strings, enhancing readability and presentation.
- Database Integration: Prepare text data for integration with databases or other systems by using the Excel VBA TRIM function to remove extraneous spaces.
- Dynamic Text Processing: Dynamically process text strings in Excel VBA macros by incorporating the TRIM function, enabling efficient manipulation and analysis of textual data.
For ready-to-use Dashboard Templates:
