This Content Covers:
- What is AutoSave in Excel?
- AutoSave Vs AutoRecover
- Turn On AutoRecover in Previous Versions of Excel
- Turn On AutoSave in Excel 365
- Adding AutoSave to QAT in Excel 365
- How to Restore Unsaved Excel Files?
- Automatically Save File Before Closing using VBA
- Some Basic Questions & Issues with AutoSave
1. What Is AutoSave in Excel?
For Microsoft 365 members, Excel now has a new function called AutoSave that automatically saves your file as you work every few seconds. With Microsoft 365, AutoSave is automatically activated when a file is stored on OneDrive, OneDrive for Business, or SharePoint Online.
2. AutoSave Vs AutoRecover
- In contrast to AutoRecover, which was included in earlier versions, AutoSave is a new function in Excel Office 365.
- When you save your Excel files in OneDrive or Sharepoint, AutoSave enables you to save your work in real-time; in contrast, AutoRecover saves the file once every 10 minutes or whatever time you specify.
3. Turn On AutoRecover in Previous Versions of Excel
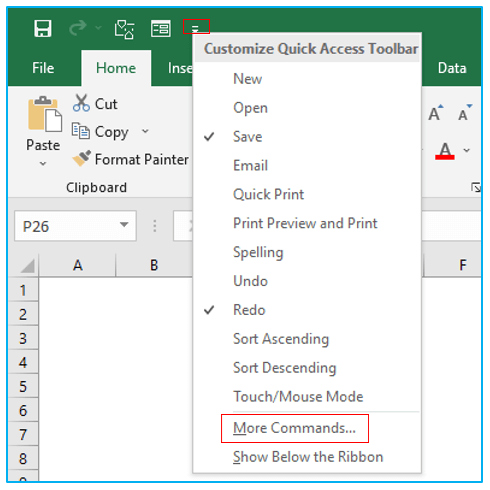
Step 1: Right click on QAT (Quick Access Toolbar) and select More Commands. This will open Excel Options dialogue box.
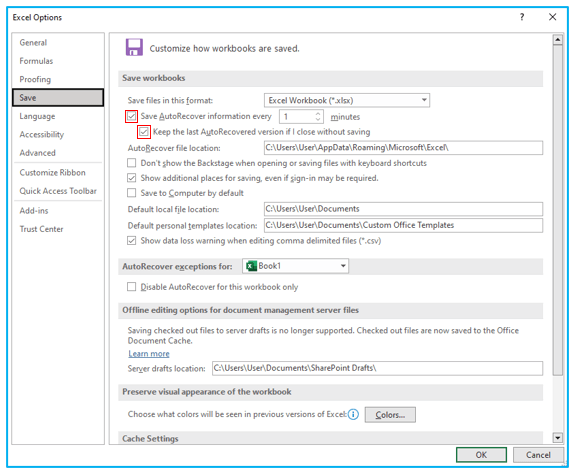
Step 2: Click on Save. To turn on AutoRecover, check Save AutoRecover information every box. This will enable the AutoRecover option. By default, the time is set to 10 minutes, but you can change it to your preference. For safety purposes of your precious work, also check Keep the last AutoRecovered version if I close without saving box. In case your app crashes, when you will open the file again Excel will show you the option to auto-recover any unsaved files/data if this option is enabled. When all these are done, press OK.
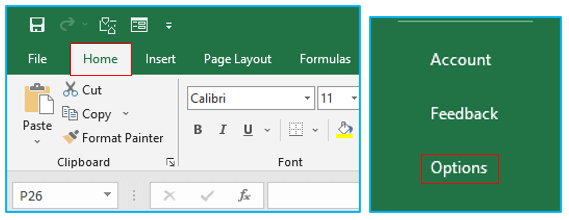
Step 3: You can also open the Excel Options dialogue box from File>>Options.
4. Turn On AutoSave in Excel 365
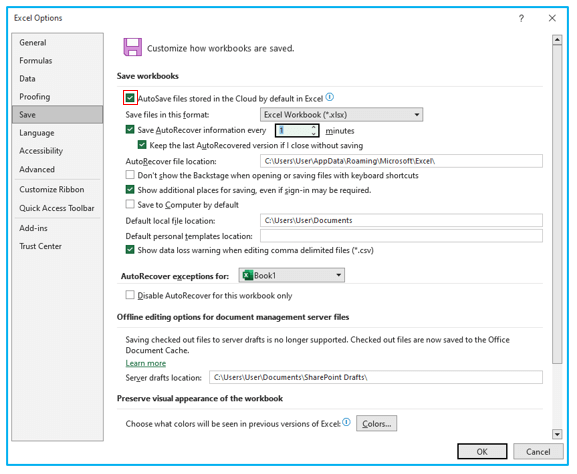
Step 1: Just like enabling AutoRecover, right click on QAT and choose More Commands. Then go to Save tab and check AutoSave OneDrive and SharePoint Online files by default on Excel box, click OK. This will turn on AutoSave in your Excel 365.
5. Adding AutoSave to QAT for Office 365
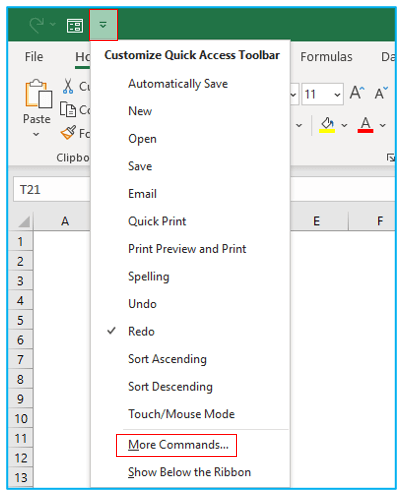
Step 1: If the AutoSave option is not displaying in your QAT by default, you can add it manually from Excel Options dialogue box. Simply click on the QAT button and choose More Commands option from the drop-down list.
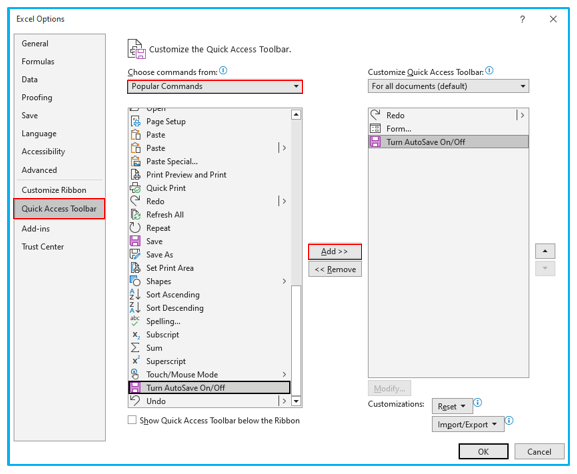
Step 2: This will open the Excel Options dialogue box. Select Quick Access Toolbar tab and choose Popular Commands in the left-hand side box. Scroll down and select Turn AutoSave On/Off, then press the Add>> button to add this option into the right-hand side box. Now press OK.
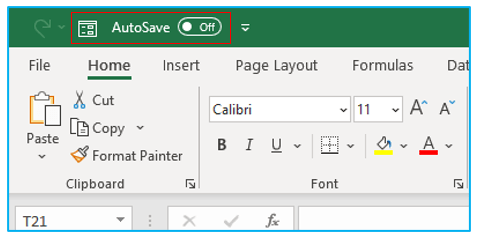
Step 3: Done, the AutoSave option is added in the QAT area. Now you can turn it on and off with one click.
6. How to Restore Unsaved Excel Files?
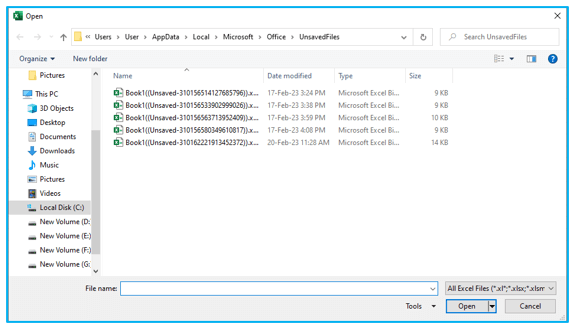
Step 1: Click on File and then Open. Select Recover Unsaved Workbooks option.
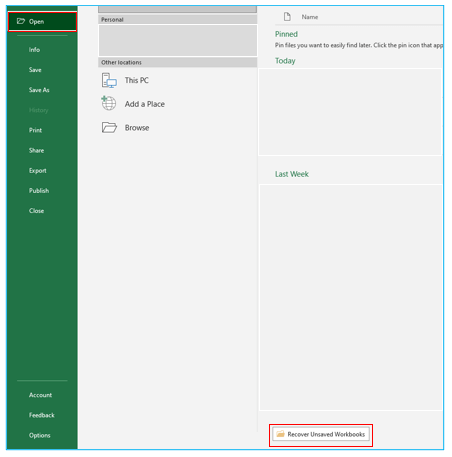
Step 2: This will open the folder where all the unsaved files are stored. Select the file you want and press OK. This will open the file in your Excel. Now you can save it.
7. Automatically Save File Before Closing using VBA
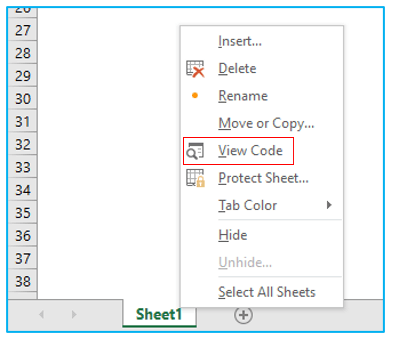
Step 1: Right click on the worksheet name and choose View Code.
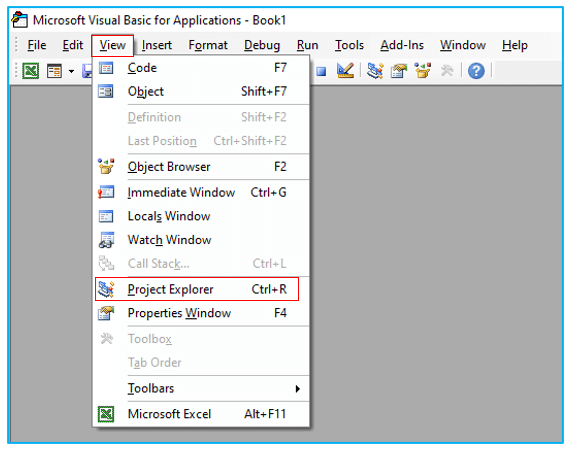
Step 2: Click on View tab then select Project Explorer.
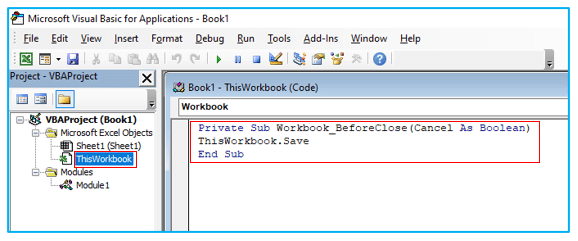
Step 3: Double click on ThisWorkbook option and it will open this workbook Code window. Insert the below given code inside the window and close it. Now, it will run this code whenever a modification is made to the worksheet and you close it without saving. This code will save it, and then close it.
Private Sub Workbook_BeforeClose(Cancel As Boolean)
ThisWorkbook.Save
End Sub
8. Some Basic Questions & Issues with AutoSave
- Why can’t I turn on AutoSave in Excel?
For some files, particularly large files or files stored on SharePoint, the AutoSave settings might not work. You can re-check the AutoSave box by selecting “File > Options > Save.”
- How to Change AutoSave Location in Excel?
Go to Files>>Options>>Save then change the AutoSave location from there.
Application of Turn on AutoSave in Excel
- Continuous Saving: Automatically save changes made to Excel files at regular intervals by turning on AutoSave, ensuring that your work is consistently saved without manual intervention.
- Preventing Data Loss: Minimize the risk of losing unsaved changes or data due to unexpected interruptions, such as power outages or system crashes, by enabling AutoSave in Excel.
- Collaboration: Facilitate real-time collaboration on Excel files by ensuring that all edits are automatically saved and synchronized across multiple users, enhancing teamwork efficiency.
- Workflow Efficiency: Streamline your workflow and reduce interruptions by allowing AutoSave to handle the saving process, freeing up time for focus on tasks at hand.
- Document Recovery: Enable AutoSave to automatically create backup versions of your Excel files, providing additional recovery options in case of accidental deletions or modifications.
- Version Control: Maintain a history of changes made to Excel files by utilizing AutoSave, enabling easy access to previous versions for auditing, tracking, or reverting purposes.
For ready-to-use Dashboard Templates:
