Print Area in Excel empowers users to precisely control what content gets printed, ensuring efficient document management. By defining the Print Area in Excel, users can eliminate unnecessary clutter, optimize printing resources, and present polished reports. Whether it’s crafting concise financial statements or preparing sleek project summaries, leveraging Print Area in Excel guarantees a streamlined printing process and enhances overall document clarity. Take command of your printing tasks today with Print Area in Excel, and achieve professional results effortlessly.
This Tutorial Covers:
- What is Excel print area
- How to set print areas in Excel
- Set Print Area From Page Layout Tab
- Set Print Area From Page Setup Window
- Set Multiple Print Areas in Excel
- From Page Break Preview
- How to Set Print Area Using VB
- For Single Worksheet
- For Multiple Worksheets
- How to View a print area and add cells in it
- How to remove print area in Excel
- How to lock print area in Excel
- Excel print area problems
1. What is Excel print area?
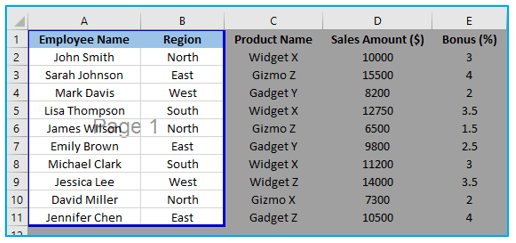
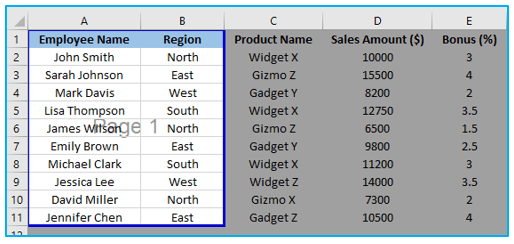
In Excel, a print area is a range of cells that you specifically select to be included in the printed output. It allows you to define and customize what content appears on each printed page, rather than printing the entire spreadsheet. By setting a print area, you can ensure that only the selected cells are printed, resulting in more organized and legible printouts.
To set a print area, you can either select the desired cells manually or use the shortcut Ctrl + P or click the Print button. When you do this on a worksheet with a defined print area, only the designated cells will be included in the printout.
You have the flexibility to define multiple print areas within a single worksheet, and each area will be printed on a separate page. It’s important to note that saving the workbook also saves the defined print area. However, if you change your mind or need to modify the print area later, you can easily clear or adjust it.
Print area definition grants you greater control over the appearance and layout of each printed page. It is highly recommended to set a print area before sending a worksheet to the printer, especially when dealing with large worksheets that may exceed the size of the paper you are using. Without a defined print area, you risk encountering messy printouts where important rows and columns may be cut off, making it difficult to read and analyze the printed data effectively.
2. How to set print areas in Excel?
To inform Excel about the specific section of your data that should be included in a printed copy, you can follow one of the following methods, which will be covered in the next part.
- Set Print Area From Page Layout Tab:
A group of cells that will be printed completely is known as a print area. If you don’t want to print the entire spreadsheet, create a print area that only includes the selection you want to print.
You can take the following actions in Microsoft Excel’s Page Layout tab to set the print area:
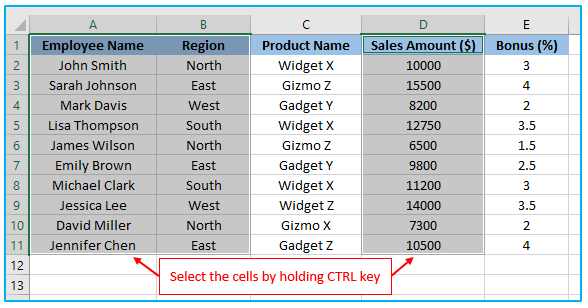
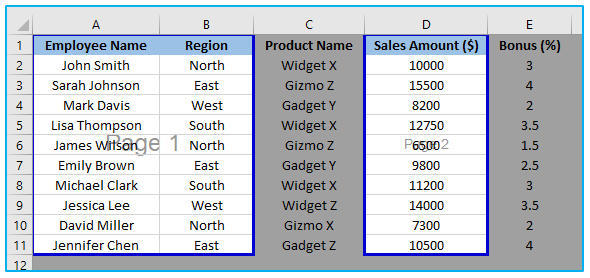
Step 1: The cells that you want to use as the print area should be selected. This could be a selection of rows, columns, or cells.

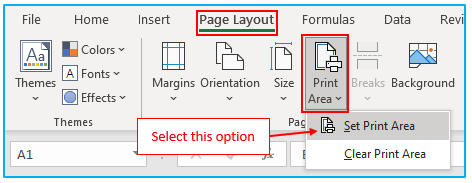
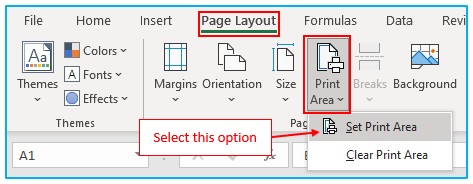
Step 2: Choose the “Page Layout” tab from the menu at the top of the Excel window.
Search the toolbar for the “Print Area” section.
Select “Print Area” from the menu.
Select “Set Print Area” from the drop-down menu to set the print area.
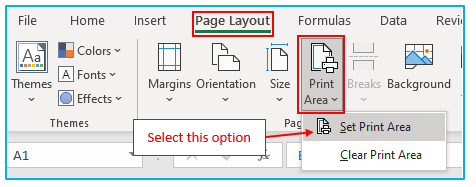
A thin gray line will now appear around the chosen cells to show that they are the print area.

You may quickly set the print area for your Excel worksheet from the “Page Layout” tab by following these instructions.
- Set Print Area From Page Setup Window:
You can also adjust the print area from the “Page Setup” Window.
You can take the following actions in Microsoft Excel’s Page Setup window to set the print area:
Step 1: Open the Excel worksheet whose print area you want to configure.
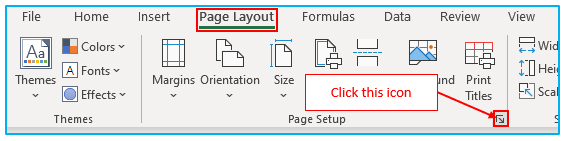
Navigate to the “Page Layout” tab at the Excel window’s top.
Click on the tiny arrow icon in the bottom right corner of the “Page Setup” group.
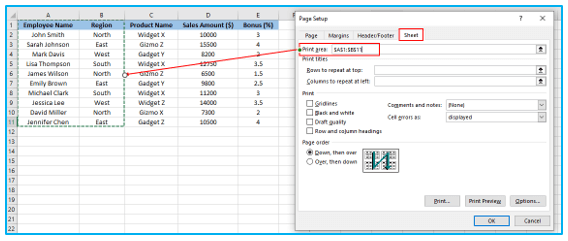
Step 2: The “Page Setup” window will open as a result. Go to the “Sheet” tab in the “Page Setup” box. Search the “Sheet” tab for the “Print Area” section.
Put the cursor in the “Print Area” field on the “Sheet” tab and choose range of cells from your worksheet.
Applying the print area setting requires pressing the “OK” button.
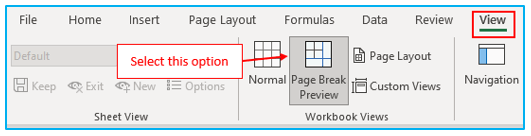
Step 3: Select the “Page Break Preview” button under the “Workbook Views” group on the “View” tab.
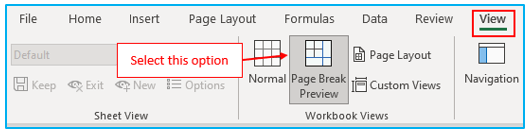
You can now see a preview of the print layout.
- Set Multiple Print Areas in Excel:
You can also set a variety of print areas in Excel. See if we can make it happen. A print area must first be configured.
Follow these steps to configure Excel to print to various print areas:
Step 1: Choose the first group of cells you want to designate as the print area.
Select the extra ranges you want to print separately while holding down the Ctrl key on your keyboard. Make sure the ranges are not adjacent to one another (non-contiguous).
Step 2: Go to the “Page Layout” tab after selecting all the appropriate ranges.
Under the “Page Setup” group, select the “Print Area” dropdown button.
Choosing “Set Print Area” from the dropdown menu will set the print area.
Each range that has been chosen will now be configured as a separate print area, each of which will print as a different page.
Step 3: Select the “Page Break Preview” button under the “Workbook Views” group on the “View” tab.
You can now see a preview of the print layout.
You may quickly create several print areas in Excel for various worksheet parts by following these steps.
Note that technique only works with non-contiguous ranges. Adjacent ranges will be combined into a single print area even when independently specified.
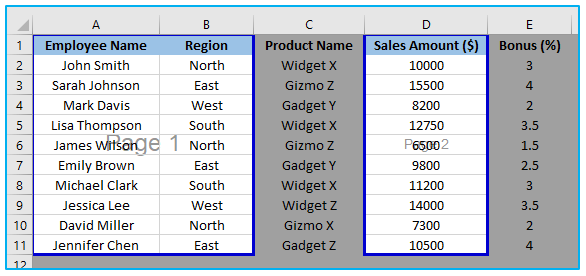
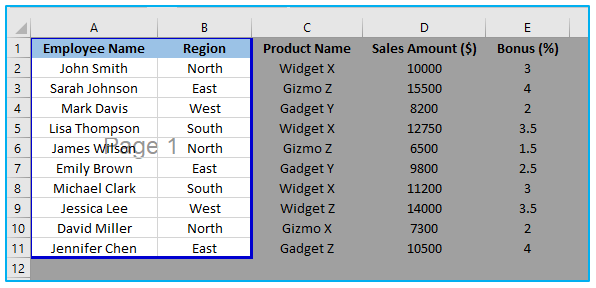
- From Page Break Preview:
The “Page Break Preview” option under the “View” tab also allows you to specify the print area.
The steps to set print area from page break preview are described below:
Step 1: Select the “Page Break Preview” button under the “Workbook Views” group on the “View” tab.

Step 2: Drag the blue lines from the edge of the page to the desired location to enclose the area you want to specify as the print area.
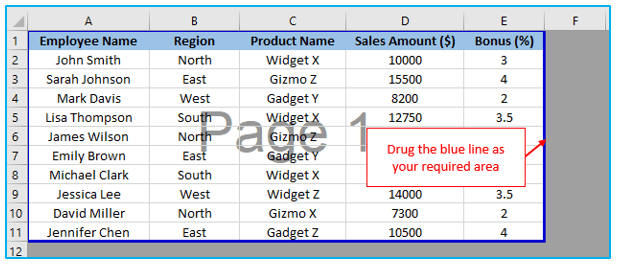
Excel will therefore set the boxed area with the blue lines to be the print area.
- How to Set Print Area Using VBA?
If you want to set a print area in Excel using a Macro written in Microsoft Visual Basic for Applications (VBA), follow these steps:
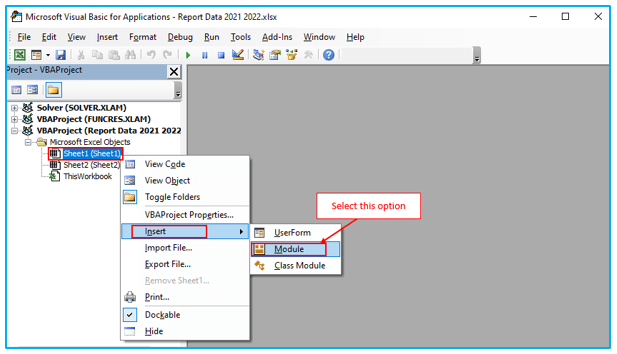
Step 1: Press ALT+F11 to open the VBA window in Excel.
In the VBA window, go to the “Insert” tab and select “Module” to open the Module (Code) window.
Step 2: In the Module (Code) window, copy and paste the following code and after typing the code, close or minimize the VBA window.
Sub Print_Area()
Dim PrintArea As Range
Dim PrintAreaAddress As String
Dim Sheet As Worksheet
On Error Resume Next
Set PrintArea = Application.InputBox(” Select a Range for Print Area”, Type:=8)
If Not PrintArea Is Nothing Then
PrintAreaAddress = PrintArea.Address(True, True, xlA1, False)
For Each Sheet In ActiveWindow.SelectedSheets
Sheet.PageSetup.PrintArea = PrintAreaAddress
Next
End If
Set PrintArea = Nothing
End Sub
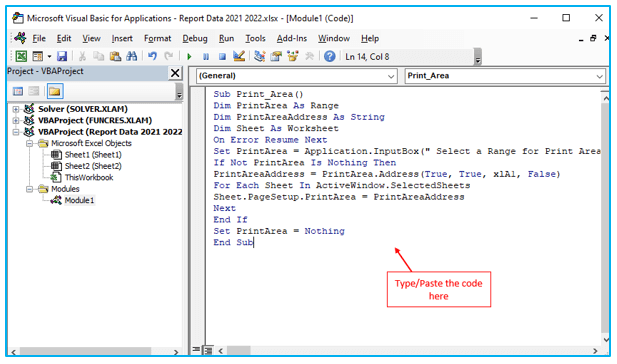
A Macro called Print_Area will be created by the code. This macro will open an input window where you can choose which cells to print in and how big the print area should be.
- For Single Worksheet:
To apply the Macro to set the print area for a single sheet in Excel, follow these steps:
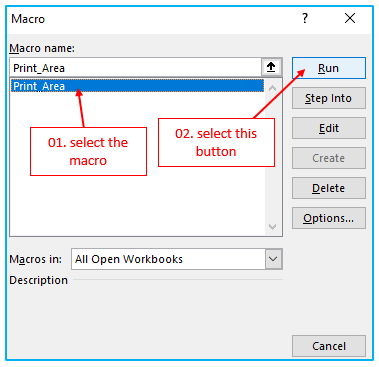
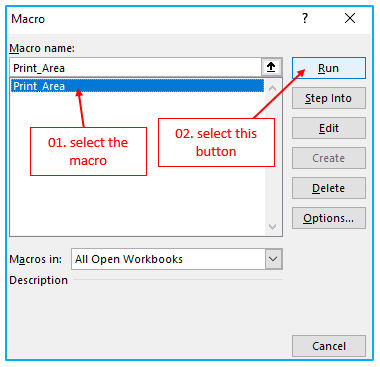
Step 1: Press ALT+F8 to open the Macro window.
In the Macro window, select “Print_Area” from the “Macro name” box.
Click on “Run” to execute the Macro.
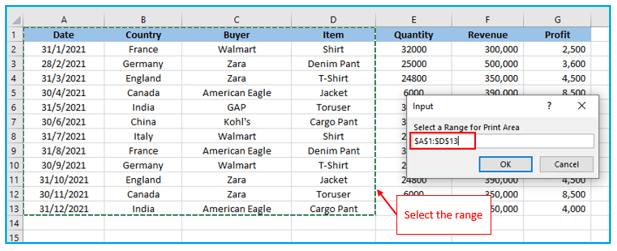
Step 2: A window named “Input” will appear.
In the “Input” window, select the cells that you want to set as the print area.
Click “OK” in the Input window.
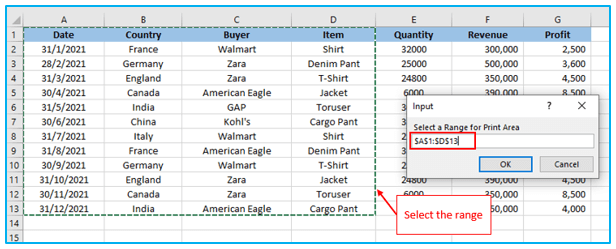
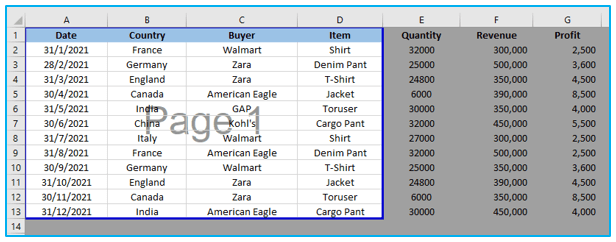
As a result, Excel will then set the selected cells as the print area for the active sheet. You can confirm this by opening the Page Break Preview, where you will see the chosen cell ranges marked as the print areas.

- For Multiple Worksheets:
The Macro mentioned earlier can also be used to set a print area from multiple sheets. Follow these steps to print multiple sheets using VBA in Excel are described below:
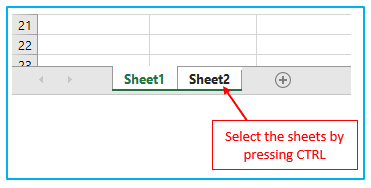
Step 1: Select the sheets where you want to set the print area by pressing CTRL and clicking on the sheet names from the Status Bar. This allows you to choose multiple sheets simultaneously.
Step 2: Press ALT+F8 to open the Macro window.
In the Macro window, select “Print_Area” from the “Macro name” box and click “Run”.
Step 3: An “Input” window will appear, prompting you to select the cells to set as print areas.
Select the desired cells in the “Input” window and click “OK”.
As a result, the selected cells will be set as the print area in all the selected sheets. You can confirm this by opening the Page Break Preview of any of the selected sheets, where you will see the chosen cell ranges marked as the print areas.
3. How to View a print area and add cells in it?
Once you have set up your print area in Excel, it’s essential to confirm that you have selected the correct cells.
The steps to view print area in Excel are described below:
Step 1: Open the “View” tab in the Excel ribbon. Select “Page Break Preview” from the options. This view allows you to see each print area that you have set for the sheet.
Review the displayed page breaks and print areas to ensure they match your intended selection.
After reviewing the print area, you can switch back to the normal view of your sheet by clicking on either the “Normal” or “Page Layout” buttons, depending on which view you were previously using.
If you find the need to include additional cells in your print area after setting it up in Excel, you have the flexibility to select both adjacent and non-adjacent cells.
The steps to add cells to a print area in Excel are described below:
Step 1: To include another set of cells within the existing print area, select the cells you want to add.
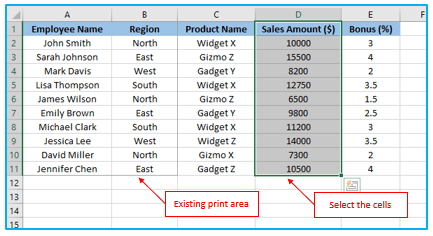
Step 2: Then, go to the “Page Layout” tab in the Excel ribbon. Under the “Print Area” drop-down box, select “Add to Print Area.”

This will create a new print area for the selected cells, treating them as a distinct group.
In the Page Break Preview, you will observe this new group of cells appearing on its own page.
You can adjust your print area in Excel to incorporate adjacent or non-adjacent cells as needed, allowing for more flexibility in printing specific sections of your data.
4. How to remove print area in Excel?
You can quickly get rid of an existing print area if you make numerous modifications to your sheet, decide you don’t want to print just that piece, or wish to set up a new print area.
The steps to remove print area in Excel are described below:
Step 1: Select the “Page Layout” tab from the Excel ribbon. In the “Page Setup” group, locate the “Print Area” button. To access the dropdown menu, click on the “Print Area” option. From the dropdown menu, select the “Clear Print Area” option.
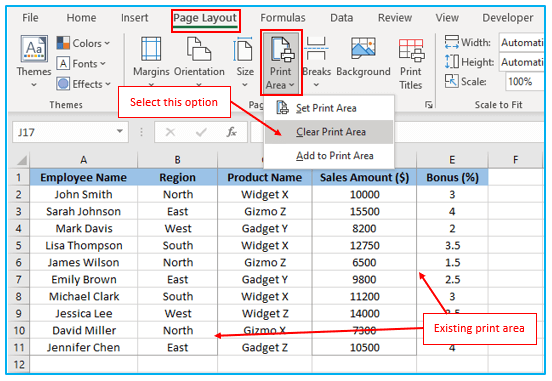
The existing print area will be cleared, and the entire sheet will be available for printing.
By following these steps, you can easily remove a previously defined print area in Excel. This allows you to reset the printing settings and ensures that the entire sheet will be printed instead of a specific section. Whether you need to make changes to your sheet, prefer not to print only a specific section, or want to set up a new print area, clearing the print area allows you to start fresh with your printing settings.
5. How to lock print area in Excel?
If you want to protect the print area in Excel to prevent others from modifying your printouts, you can use VBA (Visual Basic for Applications) to achieve this.
The method of Excel print area locking is shown below:
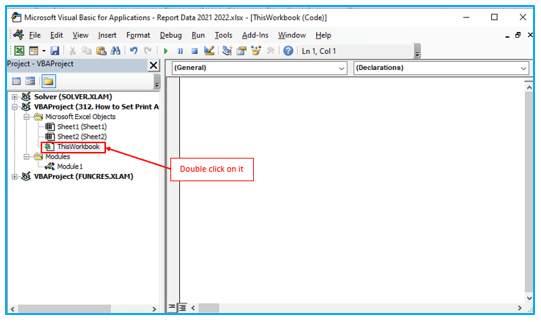
Step 1: Press Alt + F11 to open the Visual Basic Editor in Excel.
In the Project Explorer window on the left, locate and expand the node for the target workbook.
Double-click on “ThisWorkbook” to open its code window.
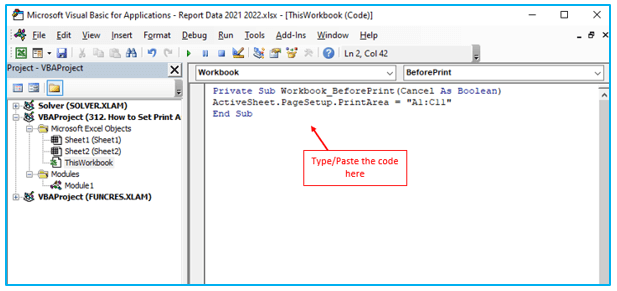
Step 2: Type or copy and paste the following code into the ThisWorkbook code window:
Private Sub Workbook_BeforePrint(Cancel As Boolean)
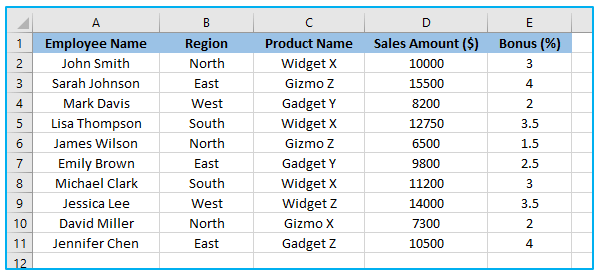
ActiveSheet.PageSetup.PrintArea = “A1:C11”
End Sub
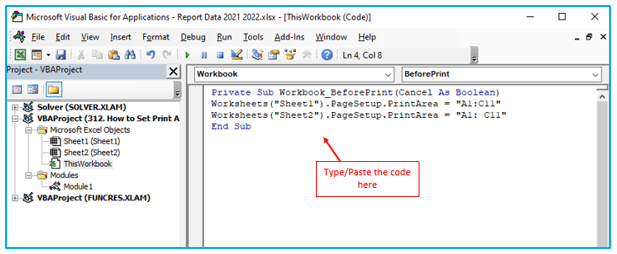
If the structure of different sheets varies, then each sheet’s print area must be specified separately.
For this, type or copy and paste the below code:
Private Sub Workbook_BeforePrint(Cancel As Boolean)
Worksheets(“Sheet1”).PageSetup.PrintArea = “A1:C11”
Worksheets(“Sheet2”).PageSetup.PrintArea = “A1: C11”
End Sub
Modify the print area range (currently set as “A1:C11”) to your desired range. You can specify different print areas for different sheets if needed.
Save the workbook as a macro-enabled file format, such as .xlsm, to enable the VBA code to run.
Ensure that macros are enabled when opening the workbook.
By implementing this approach, the specified print area will be automatically enforced before printing when the Workbook_BeforePrint event is triggered. This helps protect your desired print layout even if the worksheet or workbook is unprotected.
Note that the use of VBA and event handling requires some familiarity with Excel’s VBA programming environment. Additionally, it’s crucial to save the workbook as a macro-enabled file and enable macros to ensure the VBA code functions properly.
6. Excel print area problems:
When working with print areas in Excel, you may encounter certain problems that can affect your printing results.
Here are a few typical problems and their fixes:
Cannot set print area in Excel:
Problem: Excel does not accept the print area you define, and the Print Area field displays unexpected ranges.
Solution: Clear the print area completely by going to the “Page Layout” tab, selecting “Print Area,” and choosing “Clear Print Area.” Then, reselect the desired cells as the print area.
Not all columns are printed:
Problem: When printing, not all the columns you selected for the print area are printed.
Solution: This issue may occur if the column widths exceed the paper size. To resolve it, try adjusting the margins to make them narrower or use the scaling option, such as “Fit All Columns on One Page,” to fit all the columns within the printable area.
The print area prints on several pages:
Problem: You expect the print area to fit on a single page, but it prints on multiple pages.
Solution: If non-adjacent ranges are selected as the print area, they will be printed on separate pages. However, if a single range is splitting across multiple pages, it indicates that the range is larger than the paper size. Adjust the margins to be as small as possible or choose the “Fit Sheet on One Page” option to fit the entire range onto a single page.
By addressing these common print area problems, you can ensure that your Excel spreadsheets are printed correctly.
Application of Print Area in Excel
- Focused Printing: Define specific sections of your spreadsheet as the Print Area to ensure only essential content is printed, reducing waste and improving document clarity.
- Customized Reports: Tailor your reports by selecting the exact range of cells you want to include in the Print Area, allowing for personalized and professional-looking documents.
- Presentation Preparation: Use Print Area in Excel to prepare presentations by isolating relevant data for printing, facilitating seamless transitions between digital analysis and physical handouts.
- Clutter Reduction: Exclude extraneous information outside the Print Area to declutter your printed documents, presenting a cleaner and more organized appearance to stakeholders.
- Consistent Formatting: Maintain consistent formatting across printed materials by confining content within the designated Print Area, ensuring a cohesive and professional presentation.
- Efficient Documentation: Streamline documentation processes by setting the Print Area to include only pertinent data, optimizing printing resources and saving time for both creation and review.
For ready-to-use Dashboard Templates:
