Select Multiple Cells in Excel is an essential skill that forms the backbone of efficient data management and manipulation. Whether you’re entering data, applying formatting, performing calculations, or organizing information, the ability to select multiple cells or a range of cells empowers you to work with your data more effectively. Embrace this fundamental Excel feature to streamline your tasks, save time, and maintain data accuracy. With ‘Select Multiple Cells,’ you’re not just selecting; you’re unlocking the full potential of Excel for data handling and analysis. Whether you’re a beginner or an advanced user, mastering this skill is crucial for Excel proficiency and productivity.
This Tutorial Covers:
- Select Multiple Cells (all are contiguous)
- Select Single Row or Column
- Select Multiple Rows or Columns
- Select Multiple Non-Adjacent Rows or Columns
- Select All Cells in the Current Table or Data
- Select All Adjacent Cells in the Worksheet
- Select Multiple Non-adjacent cells in Excel
- Through Mouse and Keyboard
- Through Keyboard only
- Through Name Box
- Using Find and Replace
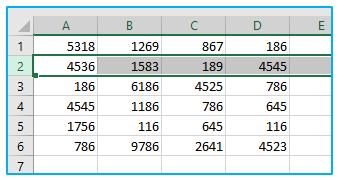
1. Select Multiple Cells (all are contiguous)
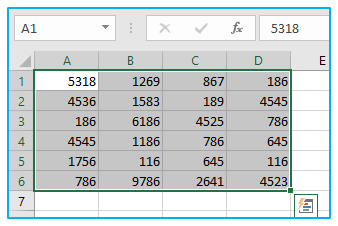
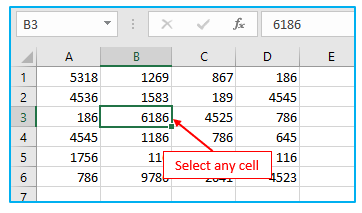
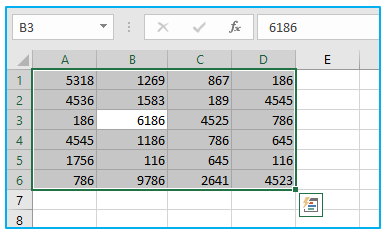
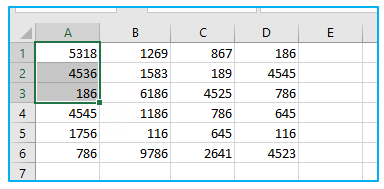
Step 1: Let’s say cell you want to select A1 through D6. Put the mouse cursor in cell A1
Choose cell A1 (by using the left mouse button). Keep pressing the mouse button.
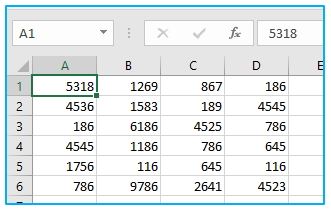
Step 2: Till cell D6, move the cursor there (select all the cells between A1 and D6). Leave the mouse left button down.
In this way, you can select multiple cells / select adjacent cells (all are contiguous)
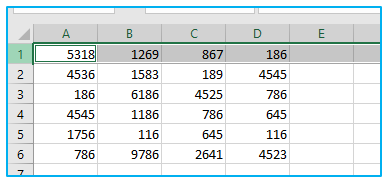
2. Select Single Row or Column
Step 1: Place the mouse cursor over the desired row’s corresponding row number, outlined in Red below.

Step 2: Use the mouse to select the entire row, click with the left mouse button. The result looks like below.
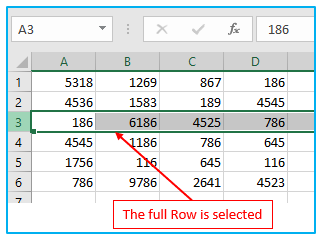
You’ll notice that the color of the selection changes when you choose the complete row (it becomes a bit darker as compared to the rest of the cell in the worksheet).
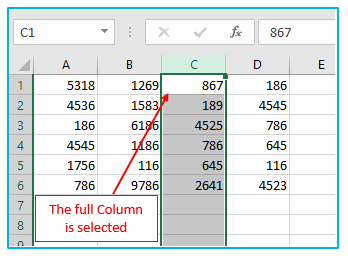
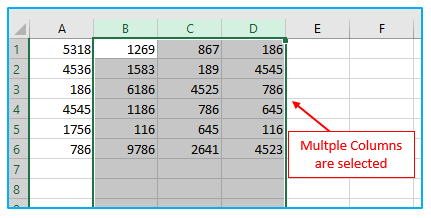
You can pick a column in Excel spreadsheet in the same way that we have selected a row (where instead of clicking on the row number, you must click on the column alphabet, which is at the top of the column).
3. Select Multiple Rows or Columns
What if you wish to choose more than one row? Furthermore, you can pick multiple rows or columns.
Step 1: Place the cursor over your desired row in the worksheet.
Press the mouse left button while your cursor is on row number two (keep the mouse button pressed).
Step 2: Keep the left mouse button still pressed and drag the cursor down until you reach your desired row. Leave the mouse left button down.
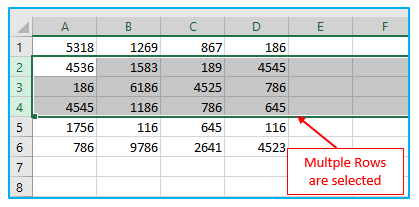
You’ll observe that doing so would select adjacent rows that you had previously selected with the mouse.
You can choose several columns using the same procedures as we used to select three nearby rows.
4. Select Multiple Non-Adjacent Rows or Columns
What if you want to select several rows but they are not adjacent?
The mouse drag method described above cannot be used in this situation since it will pick all the rows in between.
You will need to utilize a keyboard and mouse in conjunction with this.
Way to select non-adjacent cells rows or columns:
Step 1: Put the cursor over the worksheet row you wish to pick (row 1 in this case). On your keyboard, hold down the Control key. When your cursor is on row number 1, press the mouse left button.
Step 2: Leave the mouse left button down. Place the pointer over the following row (3 in this case) and press and hold the Control key on your keyboard.
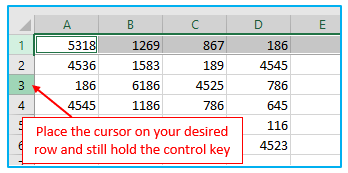
Step 3: While the mouse is over row number 3, click the left mouse button. Leave the mouse button pressed after selecting row 3 as well.
Step 4: In the same manner, choose row 5 as well. After that leave the Control key.
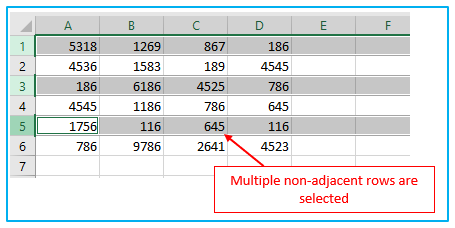
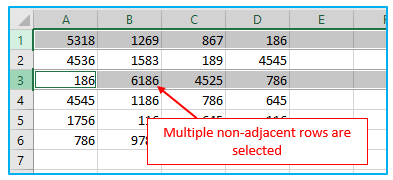
The worksheet’s non-adjacent rows would be selected using the aforementioned steps.
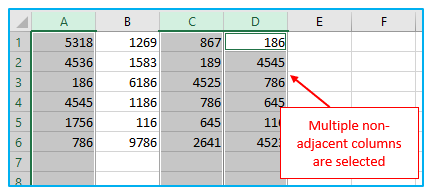
A similar approach can be used to choose numerous non-adjacent columns.
5. Select All Cells in the Current Table or Data
When you need to choose many cells (select a range of cells or ranges in excel), they are often those in a particular table or dataset. The solution is a straightforward keyboard shortcut.
The procedure of selecting all cells in the current table or data:
Step 1: Within the table or dataset, choose any cell.
Step 2: Press the “A” key while holding down the “Ctrl” key on the keyboard (Ctrl+A).
The aforementioned actions would select every cell in the data set (where Excel considers this data set to extend until it encounters a blank row or column).
Excel will regard a blank row or blank column to be the end of the data set and will not select anything that lies outside of those boundaries.
6. Select All Adjacent Cells in the Worksheet
Often time we need to select every cell in the worksheet. I frequently work with data that has been downloaded from various sources, and this data frequently has a specific format. And the first thing I do after receiving this data is picked all the cells and eliminate all formatting.
The procedure of selecting all cells in the worksheet:
Step 1: Decide which worksheet you want to select every cell in. Select the tiny, inverted triangle in the worksheet’s upper left corner.

By doing so, the full worksheet’s cells would be instantly selected (note that this would not select any object such as a chart or shape in the worksheet).
And if you love keyboard shortcuts, you can utilize the following ones:
A + A + Control (hit the A button repeatedly while holding down the control key)
You don’t need to press the A key twice if you have selected a blank cell with no data surrounding it (just use Control-A).
7. Select Non-adjacent cells in Excel
Using a mouse, click on a cell, then drag to cover all the cells you wish to pick is the simplest method for selecting a block of cells.
Alternatively, if you prefer using a keyboard, you can select an option while holding down the shift key.
However, both techniques are effective when you wish to pick a group of cells that are close together.
But what if you want to choose cells that are not nearby in Excel?
You may also do that. It’s not quite as simple as choosing the cells next to each other, but it’s still simple.
There are several easy ways to select non-adjacent single cells in Excel.
Select Cells Using Mouse and Keyboard:
The mouse is the most convenient tool for choosing non-adjacent ranges (Along with the keyboard).
The procedure of selecting Multiple Non-adjacent cells using mouse and keyboard:
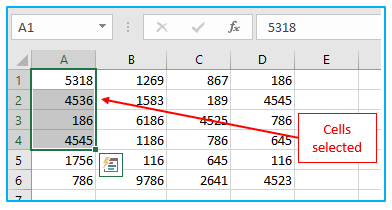
Step 1: To choose the first cell, simply click on it. The active cell will now be this one. On your keyboard, hold down the Control key.
Step 2: Drag the mouse to make the choice by left-clicking and doing so. Stop clicking the mouse. You would have a choice at this point. Holding down the Control key continues.
Step 3: Your second desired cell or range should have the pointer there. Drag the mouse to make the choice by left clicking and doing so. Stop clicking the mouse. This would choose two non-adjacent cell ranges are selected. Now, let go of the Control key.
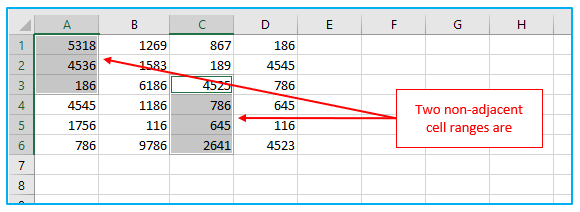
Keep pressing the control key while making your selections if you want to pick out more than two non-adjacent cell ranges.
Select Non-Adjacent Cells Using Keyboard only (f8)
Although the aforementioned technique (using a combination of the keyboard and mouse) is the most effective, you can also choose to only use the keyboard to select cells that are not adjacent.
The procedure of selecting Multiple Non-adjacent cells using the only keyboard:
Step 1: To choose the first cell, simply click on it. The active cell will now be this one.
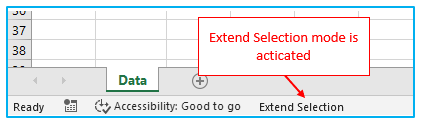
Step 2: Press the “F8” key on your keyboard. Your system will enter the “Extend Selection” mode as a result. That is also indicated in the Status bar.
Step 3: The choice is made by using the arrow keys. This will maintain a selection of all the nearby cells because you are in the Extend Selection mode.
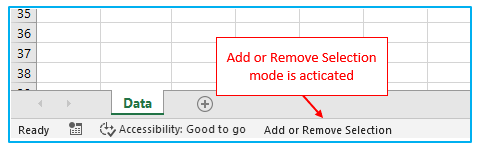
Step 4: F8 while holding down the Shift key. By doing this, the ‘Extend Selection’ mode is eliminated and replaced with Add or Remove Selection.
Step 5: The next cell you want to include in the selection should have the cursor placed there using the arrow keys.
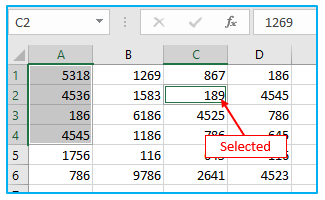
Step 6: Press the “F8” key again on your keyboard. Use the arrow keys to select.
Press the F8 key again while holding down the Shift key. By doing this, the ‘Extend Selection’ mode is eliminated and replaced with Add or Remove Selection mode.
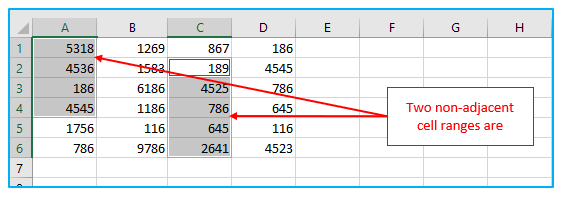
The aforementioned procedures would pick two distant cells or ranges.
Repeat the process if you want to choose more such ranges.
Learn How to Select Non Adjacent Cells in Excel Using Name Box
There are occasions when you must choose particular cells that are dispersed and distant.
In this situation, you can also choose non-adjacent cells using the Name Box in Excel.
The Name Box is always visible alongside the formula bar and is located directly next to it (to its left). Therefore, it will be quicker to enter the cell reference in the name box and press the enter key if you already know the cells you want to choose.
The procedure of selecting Multiple Non-adjacent cells through the name box:
Step 1: Select the name box by clicking it. By doing this, the name box will have the cursor.
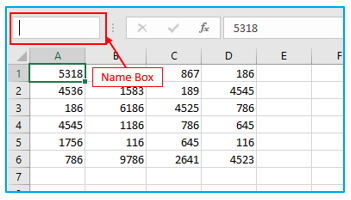
Step 2: Enter the references for the cells you want to choose (separated by comma).
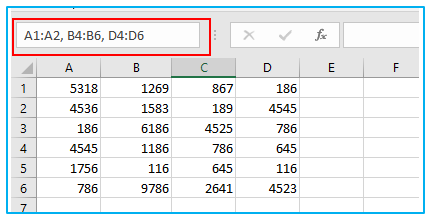
After entering the references, the result looks like this.

The actions described above would immediately pick each cell that you had named in the name box.
One of these chosen cells would operate as the active cell (and the cell reference of the active cell would now be visible in the name box).
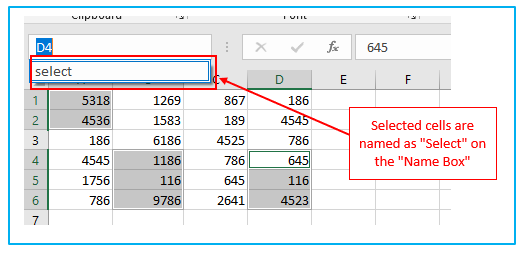
Give the name by which you chose the cells:
If you want to name these selected cells, you can do this easily. After entering the references, type a name as your desired. Now you can easily find or select these selected cells by clicking the given name on the “Name Box”.
Using Find and Replace
You might occasionally want to choose cells based on the value contained therein.
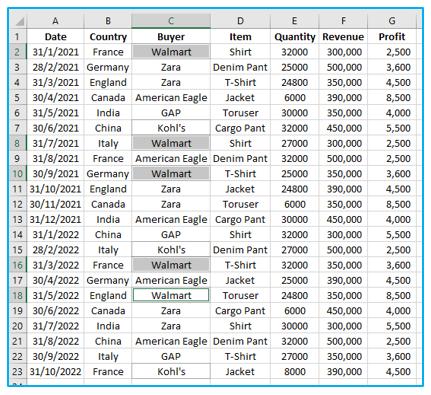
For example, you could wish to choose all the cells with the name “Walmart” if you have the revenue information for many customers.
Although you can do this manually, it works best to use Find and Replace when dealing with a big dataset.
The procedures for choosing non-adjacent cells using Find and Replace are listed below:
Step 1: Choose the entire data set.
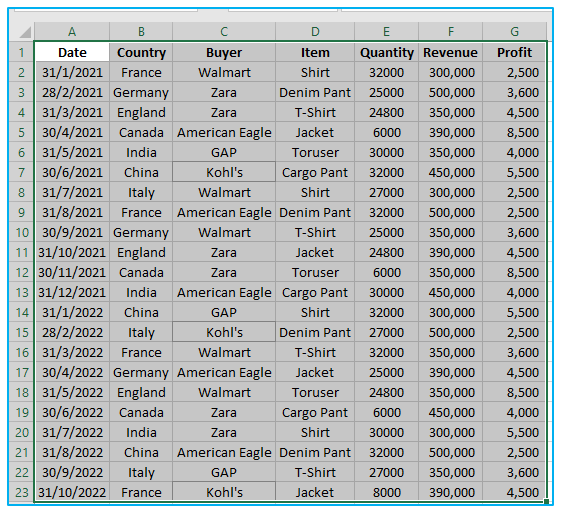
Step 2: Press the F key while holding down the Control key (or Command + F on a Mac).
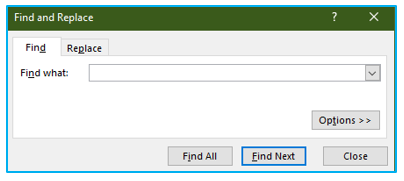
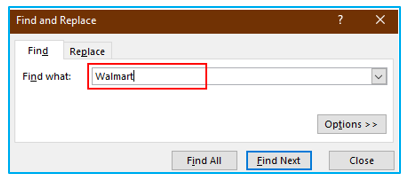
Step 3: Using the ‘Find what’ field, type “Walmart” into the Find and Replace dialog box that appears.
Step 4: Select “Find All” from the menu. This will identify every cell that has the word “Walmart.”
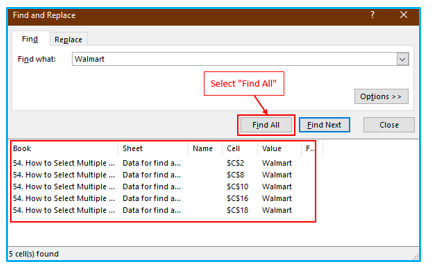
Step 5: While continuing to hold the Control key, press the A key (Ctrl+A). This will choose each of the discovered cells.
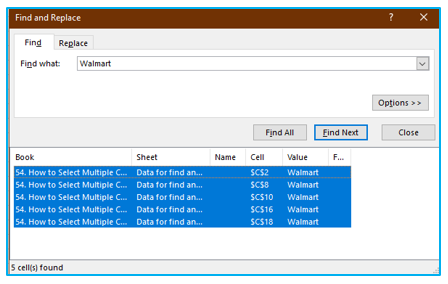
Step 6: The Find and Replace dialog box should be closed. The aforementioned actions would select every cell containing the searched text.
You can edit, change, or format these now that you have all of them selected.
To change the name from “Walmart” to “M&S,” first follow the previous methods to select every cell that has “Walmart” in it. Once it has been chosen, type “M&S” (which will only insert the name in the active cell), then while holding down the Control key, press the Enter key.
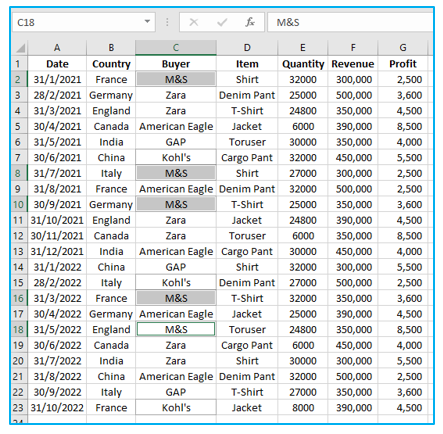
This will guarantee that the exact same text is entered in each of the chosen cells.
This method can be used to enter text, values, and formulas.
This is frequently used when you want to quickly locate and pick all the blank cells and replace them with zeros.
Application of Select Multiple Cells in Excel
- Data Entry:
- Select multiple cells to enter data simultaneously, saving time and ensuring consistency.
- Formatting:
- Apply formatting options to selected cells, such as font, color, borders, and alignment.
- Copying and Pasting:
- Copy data from one range and paste it into selected cells to duplicate information.
- Formula Application:
- Apply formulas to selected cells, allowing you to perform calculations across a range of data.
- Data Sorting:
- Sort selected columns or rows to organize data in ascending or descending order.
- Data Deletion:
- Delete selected cells or their contents to clean up or remove unwanted data.
Selecting multiple cells is a fundamental Excel skill that empowers you to efficiently manage and manipulate data in various ways, enhancing your productivity and data organization.
For ready-to-use Dashboard Templates:
