Remove Dotted Lines in Excel is a vital step towards achieving polished and professional-looking spreadsheets. This feature allows you to eliminate distracting gridlines, resulting in documents that are clearer, more presentable, and easier to read. Whether you’re preparing reports, presentations, or data visualizations, ‘Remove Dotted Lines in Excel’ ensures that your work makes a strong visual impact. By mastering this technique, you can create documents that not only convey data effectively but also leave a lasting impression. Embrace the power of ‘Remove Dotted Lines in Excel’ to elevate your Excel skills and produce documents that stand out in terms of clarity and professionalism.
I’ll demonstrate to you in this tutorial the potential causes of these dotted lines as well as how to get rid of them.
This Tutorial Covers:
- Possible Reasons for Dotted Lines in Excel
- How to Remove Dotted Lines in Excel
- Removing the Page Break Dotted Lines
- Removing Dotted Lines Border
- Removing Gridlines
1. Possible Reasons for Dotted Lines in Excel
The dotted lines in Excel may appear for a number of causes, including the following:
- Due to Excel’s use of dotted lines to graphically represent page breaks,
- Set up borders that appear as dashed lines.
- Gridlines that run throughout the entire page. These lines are not actually outlined (rather faint solid lines that look like dotted borders around the cells)
You can simply remove these lines from your worksheet to disable any one or more of these settings.
2. How to Remove Dotted Lines in Excel?
The dotted lines that appear in the Excel workbook can be removed in a variety of methods. Let’s get started and examine each method for removing these dotted lines from Excel.
- Removing the Page Break Dotted Lines
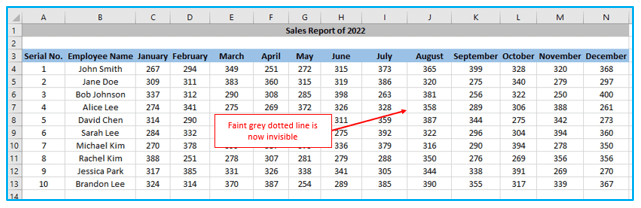
One of Excel’s most irksome features for me is this. These dotted page breaks occasionally resist vanishing, as seen in the image below.
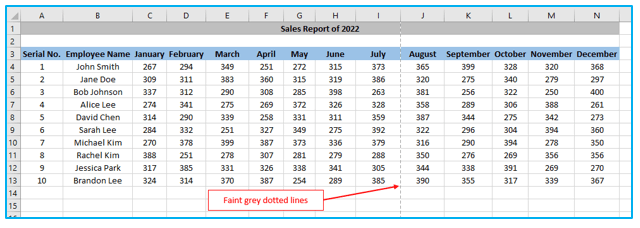
I now see the benefit and need for keeping these. Your worksheet is divided into sections so you can see what will appear on one page and what will extend to the next.
Closing the workbook and opening it again is a very simple (though not optimal) solution to this. The page break dotted lines will disappear when you reopen a spreadsheet.
How to delete dot lines in Excel is shown below:
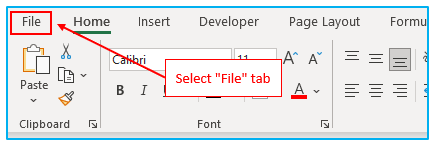
Step 1: On the “File” menu, click.
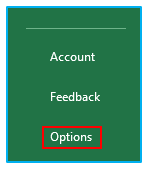
Step 2: Toggle to “Options.”
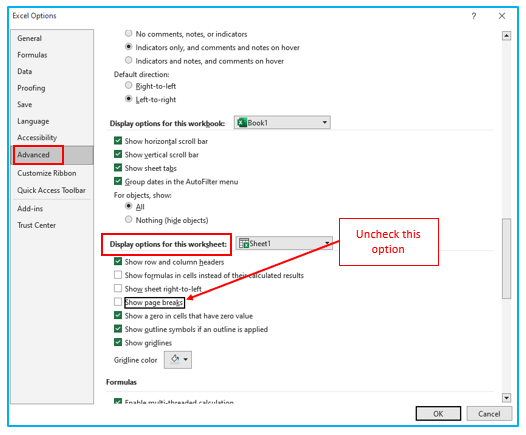
Step 3: Click on the “Advanced” choice in the left pane of the “Excel Options” dialog box that appears. To find the part titled “Display options for this worksheet,” scroll down. Deselect “Show page breaks” inside the settings menu.
The above instructions would make the workbook’s page break dotted line disappear.
Only the workbook in which you unchecked this option would be affected by the aforementioned actions to stop displaying dotted lines. If you want to remove the dotted lines from other files, you must follow the same procedure.
The dotted lines won’t appear if the print area in the worksheet has been specified. Instead, a solid line encircling the print area will be visible.
- Removing Dotted Lines Border
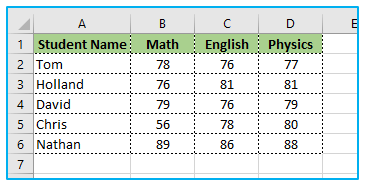
Some individuals might use dotted lines as the border, though this is less frequent than page breaks.
Something like what is displayed below:
You have two options for getting rid of these dotted lines: either entirely remove the border or convert it to a standard solid line border.
The methods to eliminate these dotted borders are as follows:
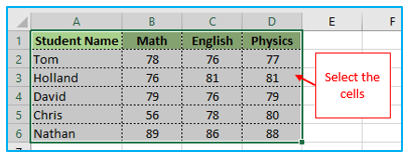
Step 1: Choose the cells whose dotted edge you want to get rid of.
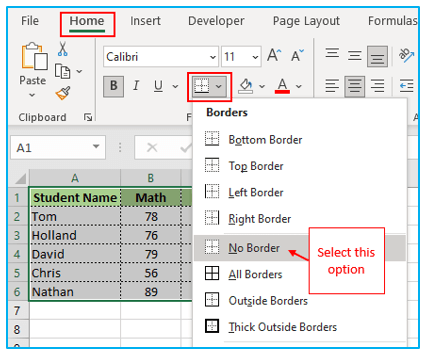
Step 2: On the “Home” option, click. Select “Border” from the drop-down menu under the “Font” category. Select “No Border” from the list of available borders.
In the selected cells, the aforementioned procedures would remove any borders.
If you’d prefer to use a different type of border in lieu of the dotted one, you can do that as well.
- Removing Gridlines
Despite the fact that the gridlines are solid lines rather than dotted lines, some individuals may still mistake them for dotted lines (as these are quite faint).
You can simply remove these gridlines, which are applied to the entire worksheet.
The procedures to remove these are as follows:
Step 1: Select “View” from the tabs. Uncheck “Gridlines” under the “Show” category.

That’s all there is to it! The worksheet’s gridlines would all be eliminated by the aforementioned procedures.
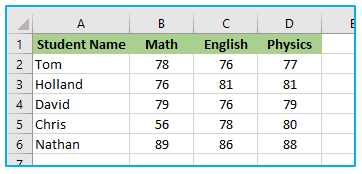
The result looks like below without gridlines.
Simply return and check the same choice if you want the Gridlines back.
These are the three methods for getting rid of dashed lines in Excel.
Application of Remove Dotted Lines in Excel
- Enhanced Printouts:
- Remove dotted gridlines for cleaner and more professional-looking printed documents and reports.
- Improved Readability:
- Eliminate distracting dotted lines to enhance the readability of your Excel worksheets and data.
- Clearer Presentations:
- When creating presentations or slides, removing dotted lines ensures a cleaner and more polished appearance.
- Custom Formatting:
- Apply your preferred formatting style without interference from default dotted gridlines.
- Data Visualization:
- Create clear and uncluttered data visualizations, such as charts and graphs, by removing distracting gridlines.
- Document Finalization:
- Before sharing or publishing your Excel files, remove dotted lines to give your documents a professional and finished look.
Removing dotted lines in Excel is a simple yet effective way to improve the visual clarity and presentation of your worksheets, making your documents more suitable for printing, sharing, and presenting.
For ready-to-use Dashboard Templates:
