Record Macro in Excel is a game-changer for automating and streamlining repetitive tasks, ensuring consistency and efficiency across your spreadsheets. By mastering this powerful feature, you can transform time-consuming processes into simple, one-click operations, freeing up valuable time for more complex analyses and decision-making. Whether you’re aiming to enhance your productivity, improve data accuracy, or create interactive reports, the ability to record macros in Excel offers endless possibilities. Embrace this functionality to take your Excel skills to the next level and make your workflow more dynamic and efficient.
This Tutorial Covers:
- What is a Macro?
- Getting the Developer Tab in the Ribbon. / How to enable macro in Excel?
- How to Record Macro in Excel? / Recording a Macro in Excel
- What Recording a Macro does in the Backend
- Absolute Vs Relative Macro Recording
- What a Macro Recorder Cannot Do
- Run a macro
1. What is a Macro?
An Excel macro is a set of actions or actions with which you can record and run indefinitely to automate repetitive work. The macro saves your keystrokes and clicks and allows users to rerun them with a single click. Running an Excel macro is simple for experienced users, but it may not be obvious to beginners.
2. Getting the Developer Tab in the Ribbon.
To begin, enable the Developer tab.
To operate a macro, initially enable the Developer tab so that it is viewable on the Excel ribbon. Because it is not visible by default, you must manually add it.
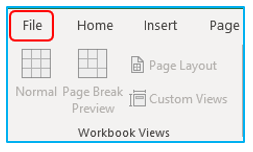
Step 1: Go to File.
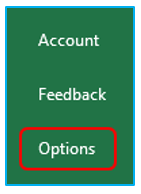
Step 2: Click Options.
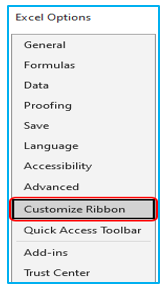
Step 3: Select Customize Ribbon.
Step 4: Select the Developer checkbox under Main Tabs.
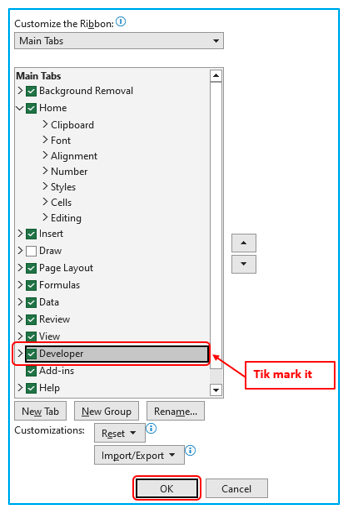
Step 5: Click OK.
Result outlined below:

Added in the excel ribbon.
3. How to Record Macro in Excel?
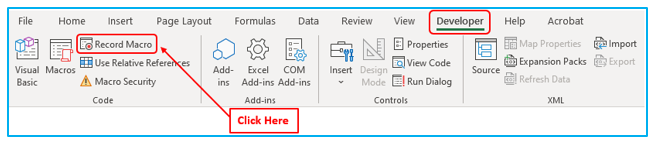
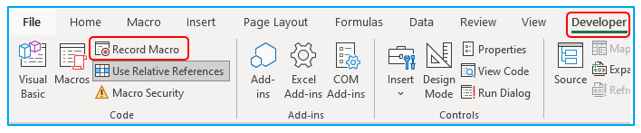
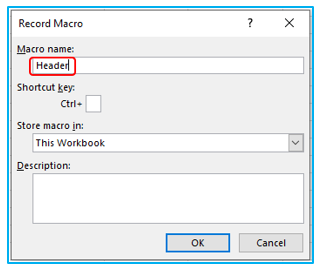
Step 1: Click Record Macro on the Developer tab’s Code group.
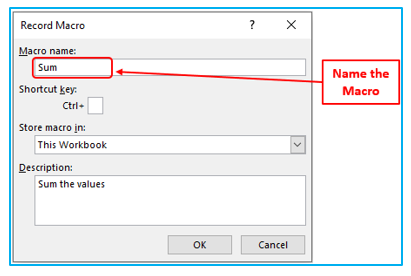
Step 2: Name the macro in the Macro name box, being as descriptive as possible.
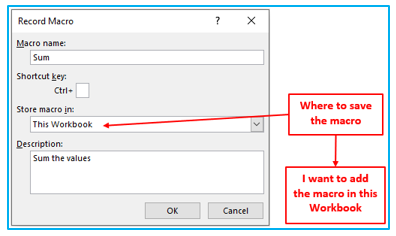
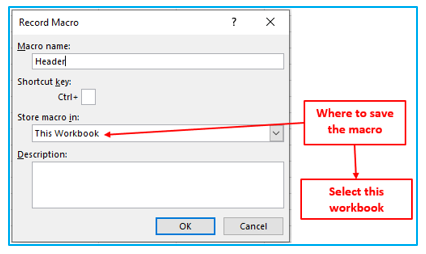
Step 3: Select where you want to save the macro by clicking the drop-down arrow to the right of the Store macro in box.
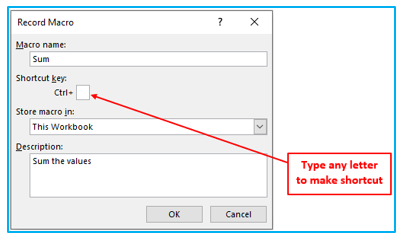
Step 4: To create a shortcut for the macro, type an upper-case or lower-case letter in the Shortcut key box. It is possible that Excel will prevent you from using an existing shortcut key. In this case, it’s best to create a one-of-a-kind key.
Step 5: In the Description box, write a description of what the macro does.
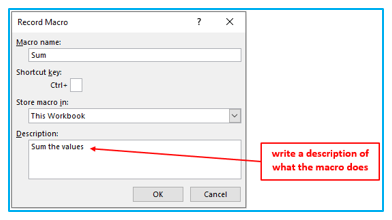
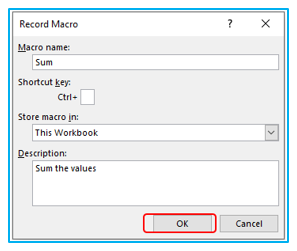
Step 6: To begin recording, click OK.
Step 7: Perform steps that you want to save to perform future tasks.
Step 8: Click Stop Recording on the Developer tab.

4. What does Recording a Macro do in the Backend?
To understand what a macro does in the backend let’s go to the VB editor and see what actually happens when you save a macro.
First, you must open the VB editor in Excel. There are many steps to open the VB editor in Excel, like:
- Open from the Developer Tab. Go to the Code group of the developer tab and click on the Visual Basic Button.
- Use the keyboard shortcut – ALT+F11
Now the VB Editor will open and let me give you a short description to make you familiar with VB Editor.
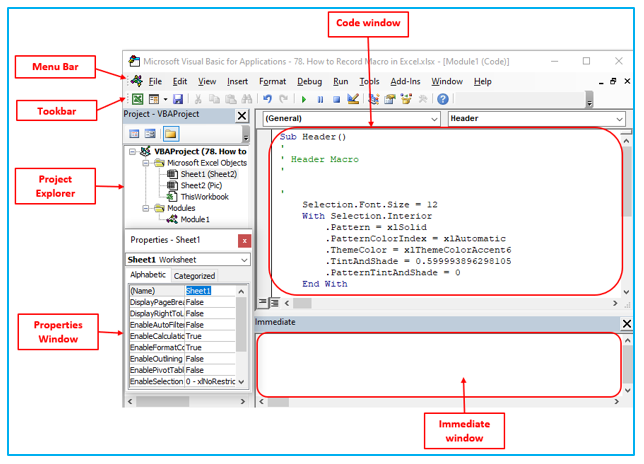
Menu bar: Here you will find all the options for VB Editor. Think of it as an VBA ribbon. There are controls to use when using the VB Editor.
Toolbar: It bundles with some useful options, like the copy and paste button. Run, reset and break buttons are always here. You can add more if you want.
Project Explorer Window: Excel lists all the workbooks and objects in each workbook in the Project Explorer window. Modules, user forms, and class modules are among the additional objects found here.
Code Window: VBA code is documented or written in the Code Window. Each object listed in the Project Explorer has its own code window, such as worksheets, workbooks, modules, and so on.
Property Window: This window displays the properties of each object. You can use it to rename objects or change their hidden properties. To see this, go to the view tab and choose Properties Window.
Immediate Window: It comes in handy when you need to check several statements or when debugging. It might not be visible by default, but you can enable it by going to the View tab and selecting the Immediate Window option.
The following events occurred in the VB Editor when we recorded the macro – Header:
- A new module was added.
- A macro with the name ‘Header’ was created.
- The code was created in the module’s code window.
When you double-click on the module (in this case, Module 1), the code window will appear.
Macro recorder occasionally adds a lot of unnecessary fluff to the code. That doesn’t mean it’s not useful. It is a great way for someone learning VBA to analyze how things work in VBA.
5. Absolute Vs Relative Macro Recording
When users record a macro with an absolute reference, the VBA code will always respond to the same cell lines that were used.
For example, if user select cell B1 and then enter the text in the Excel, and press Enter, your code will first select cell B1 and after that enter the text Excel. Next it will move to cell B2 even if the user select any other cell from the worksheet.
When you record a macro with a relative reference option, VBA does not hardcode the cell references. When compared to the active cell, it would instead focus on movement. Assume you already have cell A1 selected and begin recording the macro in relative reference mode.
Select cell B1, type Excel, and press the enter key. When you run this macro, it will no longer return to cell B1, but will instead move relative to the active cell. If cell G1 is selected, the cursor will move to G2, enter the text Excel, and finally select cell G3.
Here is the process to record a macro in a relative references’ mode:
Step-1: Select any cell. I will select cell A1.
Step-2: Click ‘Use Relative References’ in the Code group on the Developer tab.

Step-3: Now, click on the Record Macro Button.
Step-4: Name the macro in the Macro name box, being as descriptive as possible.
Step-5: Select where you want to save the macro by clicking the drop-down arrow to the right of the Store macro in box. Select This Workbook.
Step 6: To begin recording, click OK.
Step 7: Perform steps that you want to save to perform future tasks.
Step 8: Click Stop Recording on the Developer tab.
The macro would be recorded in relative reference mode. The Developer tab’s ‘Use Relative Reference’ button is an adjustable button. You can disable it (and return to absolute reference) by clicking it.
6. What a Macro Recorder Cannot Do
LIMITATIONS OF THE MACRO RECORDER
- The macro recorder is not able to create custom operations. You can certainly change the VBA code of a previously recorded macro. However, it lacks the flexibility of a custom VBA code.
- The macro recorder cannot carry out an order unless the user selects an object. For instance, it cannot switch to another sheet and delete a specific range unless the operator does so manually while recording it.
- A macro procedure cannot accept arguments. There will never be any arguments when you record a macro. A subroutine can accept input arguments that can be used to perform a task within the macro. This cannot be done while recording a macro because the recorded macros are independent and not linked to any other existing macros.
- Recorded macros cannot execute commands in loops that repeat themselves, such as Do While, Do Until, For Next, and so on.
- It cannot accept any external arguments or events. That is, each recorded macro is self-contained.
7. Various Methods for Executing a Macro in Excel
However, macros can be executed in a variety of ways.
- Run a Macro from the Excel ribbon
- Run a macro with custom keyboard shortcut
- Run macro from Visual Basic Editor
- Run macro button in Excel
- Run a Macro from a graphic object
Application of Record Macro in Excel
- Automate Repetitive Tasks: Use Record Macro in Excel to capture and automate repetitive actions, such as formatting, data entry, and calculations, saving time and reducing manual errors.
- Generate Custom Reports: Create macros to quickly generate and format reports according to specific requirements, ensuring consistency and efficiency in report creation.
- Data Cleaning: Automate the process of cleaning data, including removing duplicates, correcting formatting, and standardizing data entries, to improve data accuracy and analysis.
- Streamline Complex Calculations: Record complex formula applications and data manipulations to reuse with different datasets, enhancing productivity and ensuring calculation consistency.
- Batch Processing: Use macros to perform batch operations, such as updating or converting large sets of data, applying uniform formatting, or conducting bulk imports/exports.
- Interactive Tools Creation: Develop interactive Excel tools and dashboards by recording macros for custom navigation, filtering, and data manipulation, enhancing user experience and data accessibility.
You may be interested:
