Highlight blank cells in Excel to quickly navigate and manage data within your spreadsheets effectively. Whether you’re tidying up data entry, preparing for a presentation, or conducting data analysis, knowing how to mark these cells can streamline your workflow. This guide will walk you through the process of highlighting and filling down blank cells, ensuring your datasets are clean and comprehensively utilized. By mastering these simple steps, you’ll enhance your Excel proficiency and ensure that no detail, no matter how small, is overlooked in your data-driven tasks.
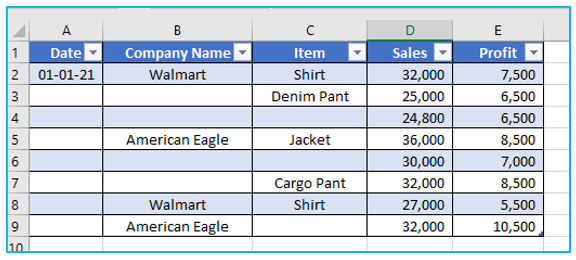
Blank cells in a dataset can occur for a variety of causes, including the following:
- The information is unavailable.
- Data points were unintentionally deleted.
- A blank cell is produced when a formula returns a string that is empty.
First, we must fill in the blanks. If not, it might lead to certain issues. Naturally, you can manually type into the empty cells. But if you have a huge dataset, it will be really tiresome. Our methods will enable you to quickly fill in the blanks in this situation.
This Tutorial Covers:
- Highlight or Select Blank Cells in Excel
- Highlight blank cells using conditional Formatting
- Select and Highlight Blank Cells in Excel
- Using VBA to Highlight Blank Cells
- How to Fill down blank cells in Excel
- Way -01: Fill down using Formula (GoTo Special + Formula)
- Way -02: Fill down using easy VBA Code
- Way -03: Fill down using easy Power Query
1. Highlight Blank Cells in Excel
While it’s simple to identify these blank cells in a small dataset, doing so manually in a large dataset with hundreds of rows and columns would be extremely time-consuming and error-prone. There are various ways to highlight blank cells in Excel. They are:
- Highlight blank cells using conditional Formatting
- Select and Highlight Blank Cells in Excel
- Using VBA to Highlight Blank Cells
Highlight blank cells using conditional Formatting
When the specified condition is satisfied, conditional formatting is an excellent way to highlight cells based on their value.
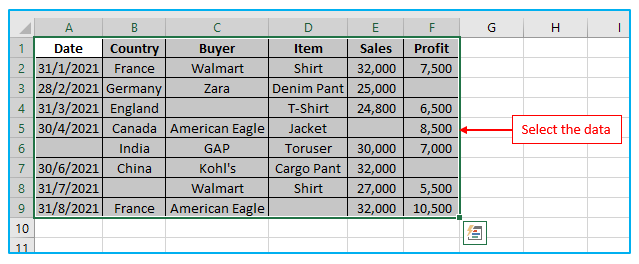
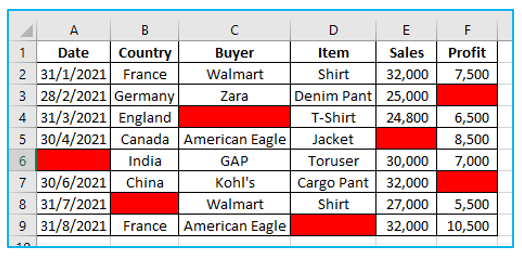
Step 1: Simply select the data to start, outlined in Red below.
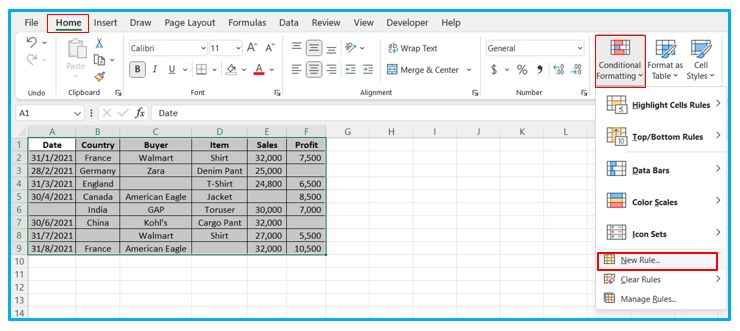
Step 2: Select the Home tab. Select “New Rule” from the Conditional Formatting drop-down menu, outlined in Red below.
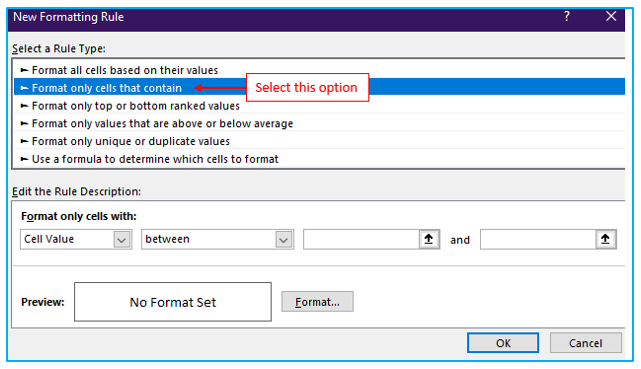
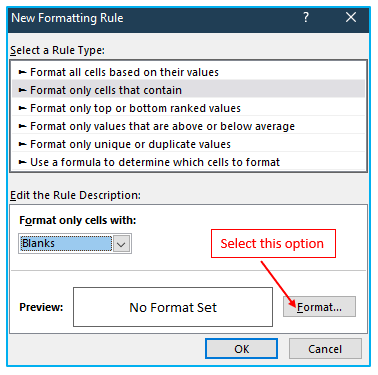
Step 3: Select “Format only cells that contain” in the “New Formatting Rules” dialog box, outlined in Red below.
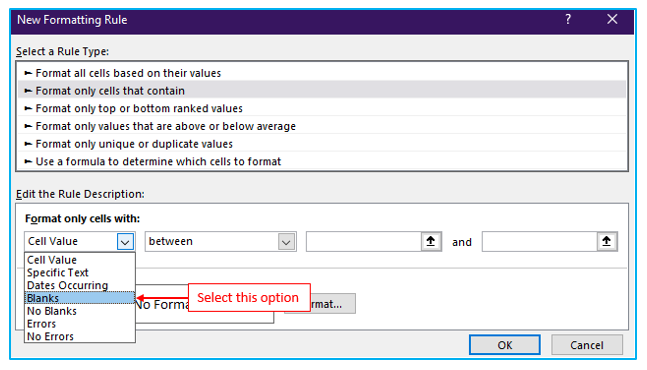
Step 4: Choose “Blanks” from the drop-down menu, outlined in Red below.
Step 5: Click “Format”, outlined in Red below.
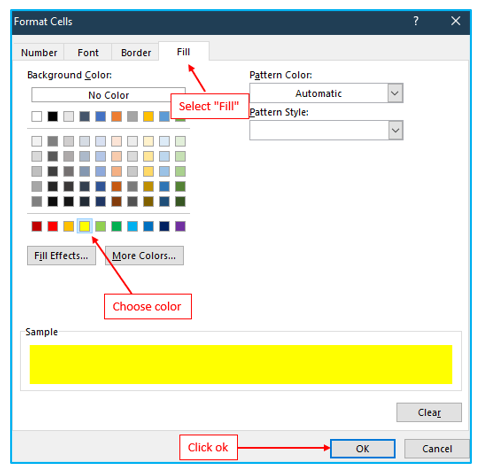
Step 6: Go to “Fill” option and select color and then click ok, outlined in Red below.
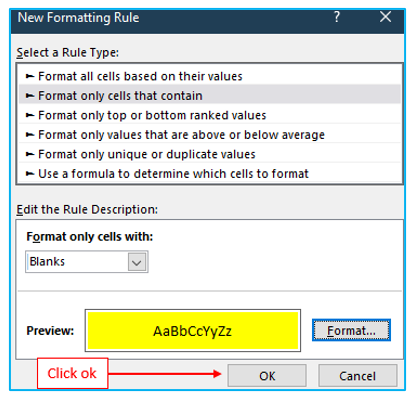
Step 7: Click ok, outlined in Red below.
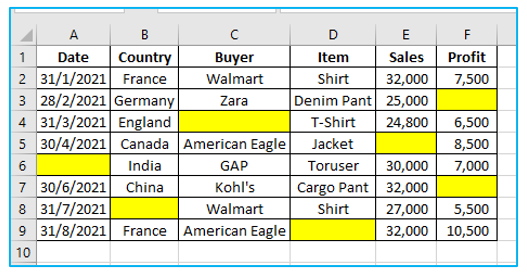
After clicking ok, the result looks like below, outlined in Red below.
Be aware that conditional formatting for blank cells is dynamic. This implies that if conditional formatting is used and a data point is deleted, that cell will be automatically highlighted.
But there is a cost associated with this dynamic behavior. When used on huge data sets, conditional formatting for blank cells/conditional formatting blank cells can be unstable and slow down your workbook.
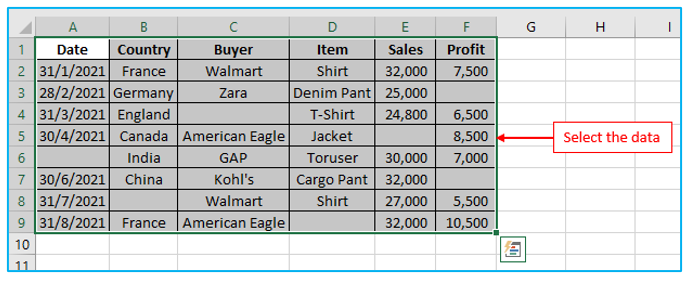
Select and Highlight Blank Cells in Excel:
You can use the “Go to Special” technique to quickly select blank cells in Excel and highlight them.
Step 1: Simply select the data to start, outlined in Red below.
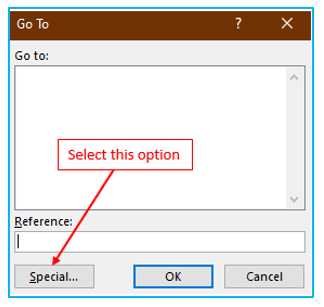
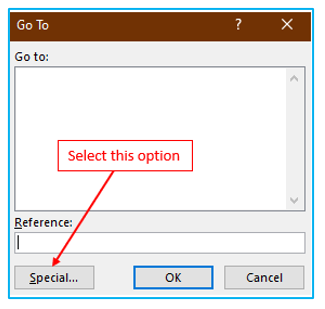
Step 2: Hit the F5 key on the keyboard. The “Go To” dialog box will appear as a result. After that select the “Special” button in the “Go To” dialog box, outlined in Red below.
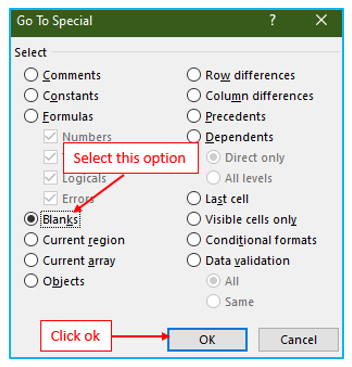
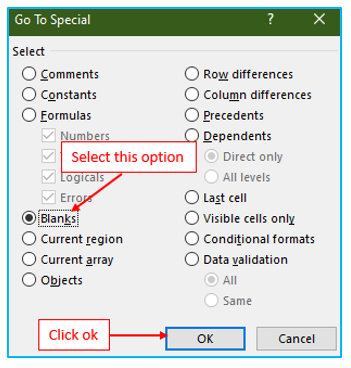
Step 3: Choose Blanks from the “Go To Special” dialog box and the click ok, outlined in Red below.
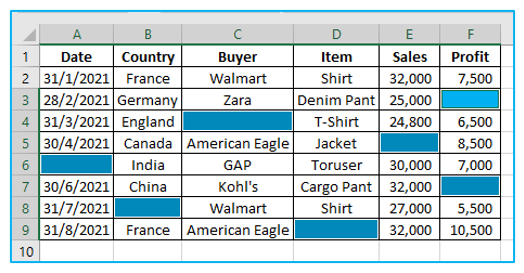
After clicking ok, with all the blank cells selected, highlight these by giving them a cell color.
The result looks like below.
As previously indicated, this technique is helpful for swiftly selecting and highlighting all of the blank cells. The same procedures can also be used to pick every empty cell and then type 0 or NA or any other pertinent text into it.
Be aware that this approach is not dynamic, unlike conditional formatting. Once you do it, if you accidentally erase a data point, it won’t be marked.
Using VBA to Highlight Blank Cells
A short VBA script can be used to highlight empty cells in a chosen dataset.
When you frequently need to locate and highlight empty cells in data sets, this method is more appropriate. The code below can be used to create an add-in or be saved in your own macro workbook with ease.
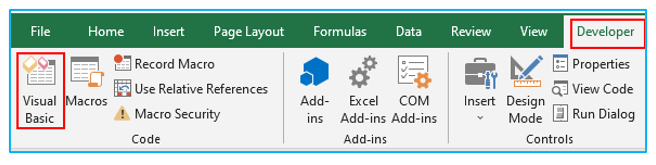
Step 1: Click “Visual Basic” under the Developer tab (or use the ALT + F11 keyboard shortcut), outlined in Red below.
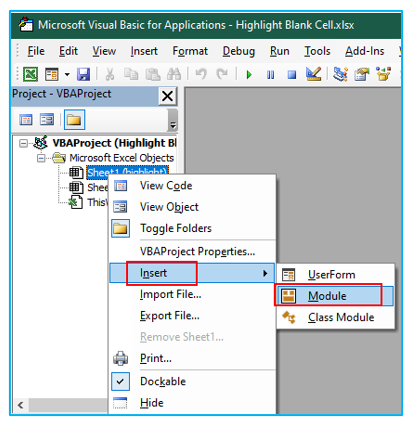
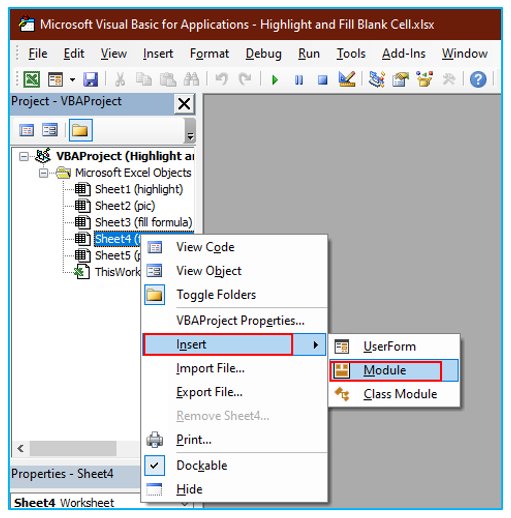
Step 2: Right-click any of the sheet names in the Project Explorer of the VB Editor (if Project Explorer is not visible, press CONTROL + R). After that select “Module” by clicking on “Insert”, outlined in Red below.
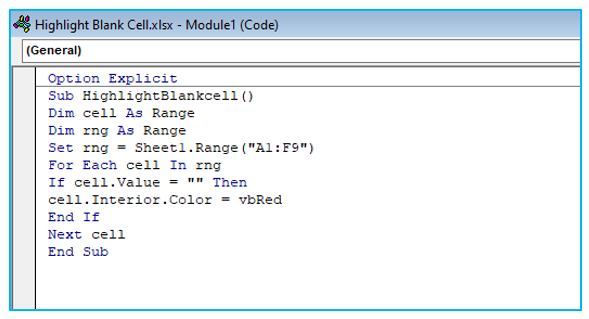
Step 3: Copy the VBA code as shown below, then paste it in the Module code window.
Option Explicit
Sub HighlightBlankcell ()
Dim cell As Range
Dim rng As Range
Set rng = Sheet1.Range(“A1:F9”)
For Each cell In rng
If cell.Value = “” Then
cell.Interior.Color = vbRed
End If
Next cell
End Sub
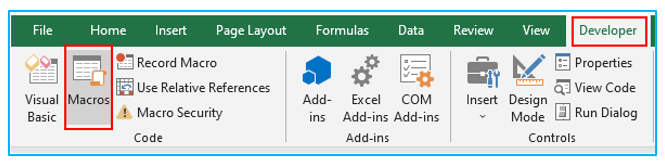
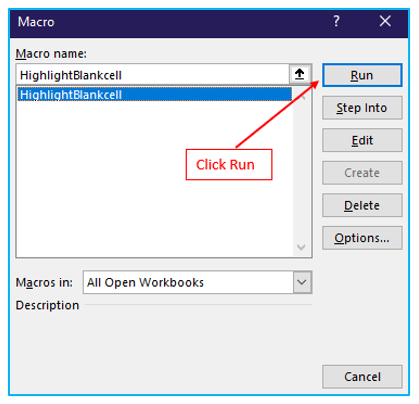
Step 4: Go to the Developer tab after exiting VB Editor, then select “Macros.”
Step 5: Choose the ‘HighlightBlankCells’ macro from the Macro dialog box, then click Run.
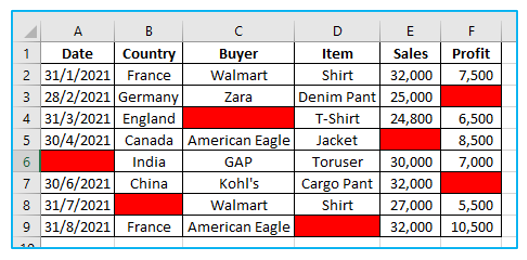
After that, the result looks like below:
Using the VB Editor:
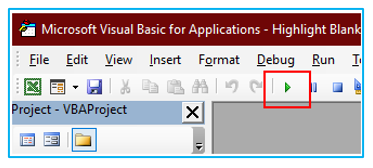
Step 1: Click “Visual Basic” under the Developer tab (or use the ALT + F11 keyboard shortcut), outlined in Red below.

Step 2: In the toolbar, select the Green Triangle button (or hit the F5 key), outlined in Red below.
Step 3: Choose the ‘HighlightBlankCells’ macro from the Macro dialog box, then click Run.
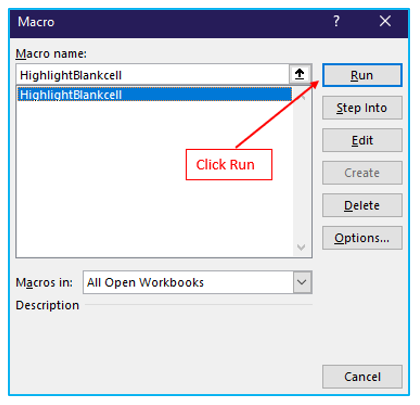
After that the result looks like below.
2. How to Fill down blank cells in Excel?
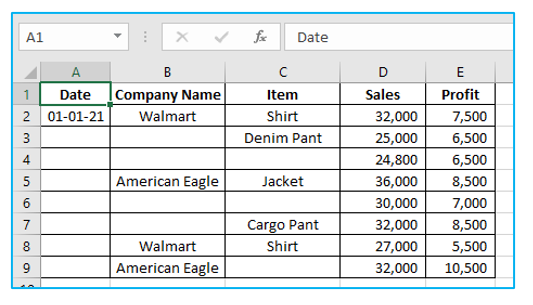
You may frequently come across a data set with only one cell containing data and blank cells up until the next value. Filling down or copying down a value into the cells below is simple with Excel. To copy a cell’s contents to the cells below it, just double-click on the copied cell or drag the fill handle downward.
There are 3 ways to fill down blank cells in Excel. They are:
- Using Formula
- Using easy VBA Code
- Using easy Power Query
- Way -01: Fill down using Formula (GoTo Special + Formula)
Procedure of filling down using Formula (GoTo Special + Formula)
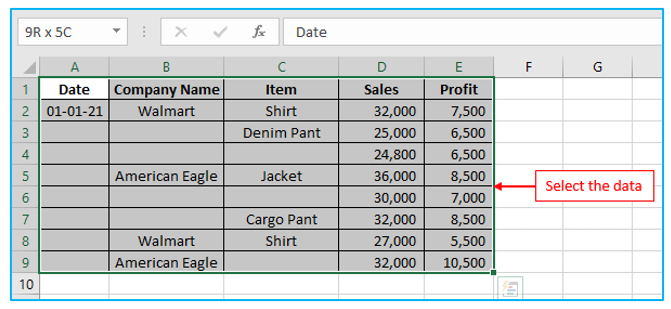
Step 1: Simply select the data to start, outlined in Red below.
Step 2: Hit the F5 key on the keyboard. The “Go To” dialog box will appear as a result. After that select the “Special” button in the “Go To” dialog box, outlined in Red below.
Step 3: Choose Blanks from the “Go To Special” dialog box and the click ok, outlined in Red below.
After that, the result looks like below:
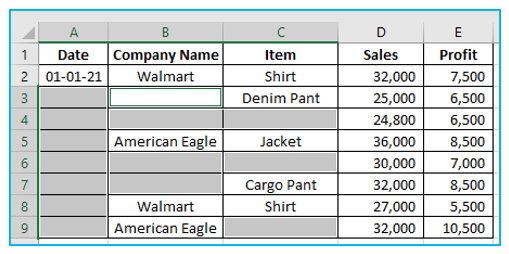
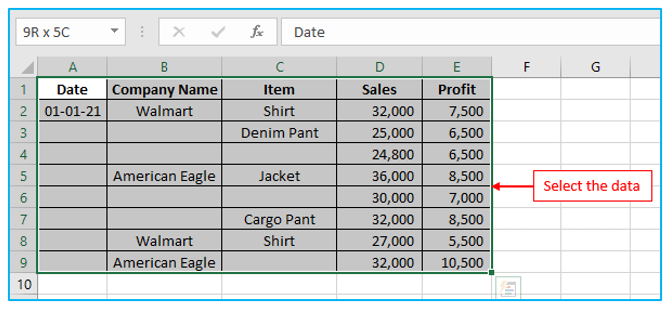
You would observe that one blank cell is lighter than the other blank cells in the selection of blank cells. The active cell for the formula we’re going to enter is this one.
No matter where the cell is in the selection, our approach would still function.
Here are the steps to fill the selected blank cells with data:
Step 1: Press the keyboard’s equal-to (=) key. In the active cell, this will insert an equal to sign.
After that Use the up arrow to move up. By doing so, the cell reference of the cell above the active cell will be inserted. For instance, in our scenario, the active cell is B3, and after doing these two procedures, =B2 is entered in the cell.
Step 2: Press the Enter key while holding down the Control key. The aforementioned actions would automatically insert the value above all of the blank cells.
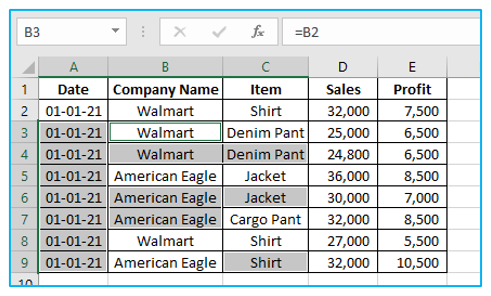
Note that we filled the empty cells in this example using formulae. Paste Values in the same column after Copying the one where the process was completed. The information will be kept in the dataset as values. If you don’t copy and paste values, sorting will be difficult.
Even though it may seem like there are too many steps, once you master this technique, you’ll be able to fill down data in Excel quickly and within a few seconds.
When employing this strategy, you now have two more considerations to make.
- Way -02: Fill down using easy VBA Code
Another method to fill in empty cells is Excel VBA. Visual Basic for Applications is the official name. It is employed to carry out numerous operations and automate processes. We’ll utilize the same dataset once again here.
The procedure of filling down using easy VBA Code
Step 1: Simply select the data to start, outlined in Red below.
Step 2: Click “Visual Basic” under the Developer tab (or use the ALT + F11 keyboard shortcut), outlined in Red below.

Step 3: Right-click any of the sheet names in the Project Explorer of the VB Editor (if Project Explorer is not visible, press CONTROL + R). After that select “Module” by clicking on “Insert”, outlined in Red below.
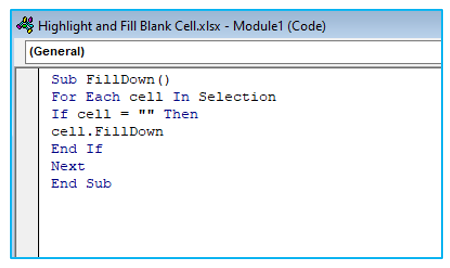
Step 4: Copy the VBA code as shown below, then paste it in the Module code window.
Sub FillDown()
For Each cell In Selection
If cell = “” Then
cell.FillDown
End If
Next
End Sub
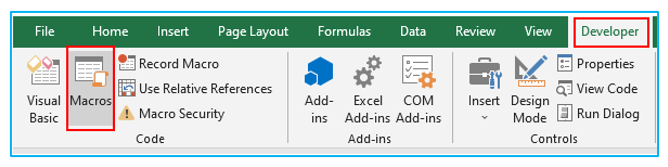
Step 5: Go to the Developer tab after exiting VB Editor, then select “Macros.”
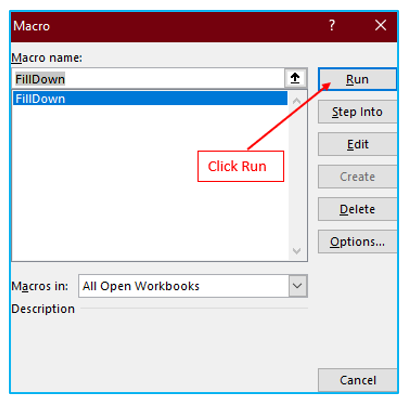
Step 6: Choose the ‘FillDown’ macro from the Macro dialog box, then click Run, outlined in Red below.
After that the result looks like below.
The VBA code would be run as a result of the steps above, and your data would be put in.
You must save this file as a macro-enabled Excel worksheet if you plan to use this VBA code again in the future (with a .XLSM extension).
You can also make this macro a part of your Quick Access Toolbar, which is constantly visible and accessible with just one click (in the workbook where you have the code in the backend).
Therefore, all you have to do the next time you have data that needs to be filled-down is make the selection and then click the macro button on the Quick Access Toolbar.
This macro can also be included in the Personal Macro Workbook, where it can then be used in any workbook on your computer.
- Way -03: Fill down using easy Power Query
Filling in the blanks is made very simple by Excel Power Query. One of the fastest approaches is this. You must turn the dataset into a table in order to use this technique.
Procedure of filling down using easy Power Query
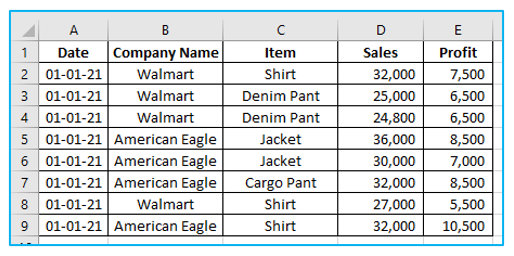
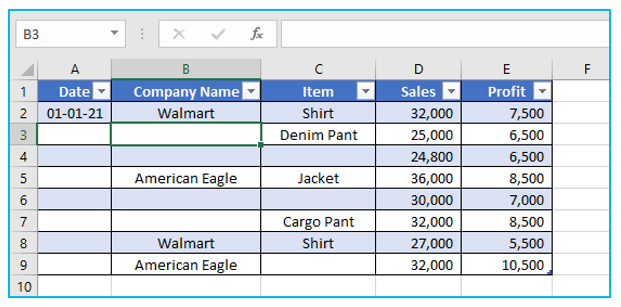
Step 1: First of all, simply choose any cell in the dataset. We have selected Cell A1.
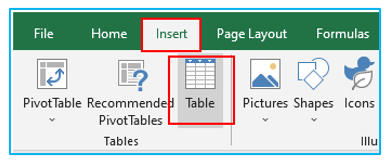
Step 2: Select the “Insert” tab from ribbon and select “Table”, outlined in Red below.
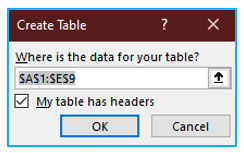
Step 3: It will launch a Create Table window. Check the box next to “My table has headers.” Click OK to continue.
After that, the result looks like below:
Step 4: Now select any cell from the table by doing so. Here, Cell B3 has been chosen.
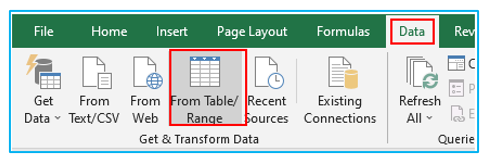
Step 5: Then, go to the “Data” tab from ribbon and select ‘From Table/Range’.
Step 6: It will then open a Power Query Editor window. Our table will be inside of it.
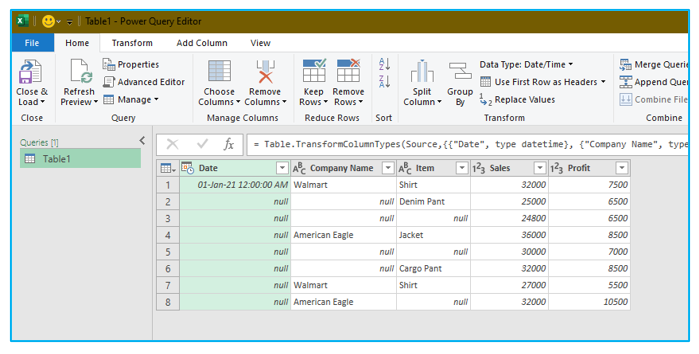
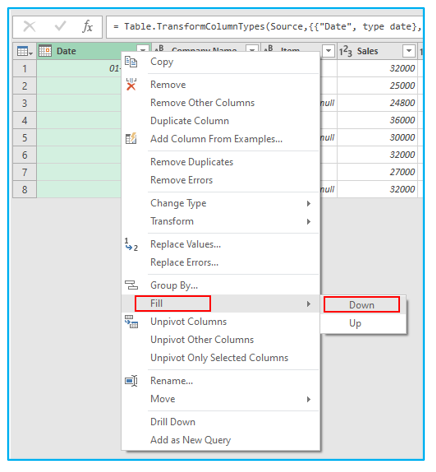
Step 7: Right-click the column headers that have empty cells and then choose “Fill” and “Down” from the drop-down menu, respectively.
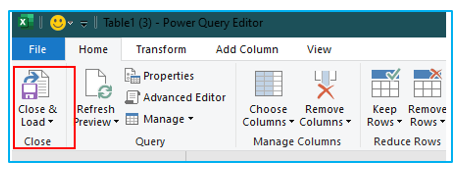
Step 8: After that, select ‘Close & Load’.
Step 9: Following that, a new sheet containing a table with the modifications we made in the Power Query Editor will appear.

For ready-to-use Dashboard Templates:
