Email From Excel Sheet marks a significant advancement in your workflow efficiency, seamlessly bridging the gap between data analysis and communication. By mastering this powerful integration, you ensure that your valuable insights and reports are shared promptly and accurately, directly from your spreadsheet environment. This capability not only streamlines your processes but also enhances collaboration, allowing you to convey critical information with precision and ease. Harness the full potential of sending Email From Excel Sheet, and elevate your data-driven communication to new heights of effectiveness and professionalism.
Sending emails from an Excel sheet can be a time-saving and convenient way to streamline your workflow, especially if you work with spreadsheets frequently. Whether you need to send reports, invoices, or any other information, being able to send emails directly from Excel can save you a lot of time. With this guide, you’ll be able to send emails from Excel like a pro and boost your productivity.
This Tutorial Covers:
- Send a Part of the Worksheet as Email Body
- Send a Single Excel Worksheet as an Email Attachment
- Send the Entire Workbook as an Email Attachment
1. Send a Part of the Worksheet as Email Body
The “Send to Mail Recipient” option needs to be added to the “Quick Access Toolbar” before you can proceed. As a result, it will be possible to email an entire Excel spreadsheet or only a portion of it.
Here’s how you can do it:
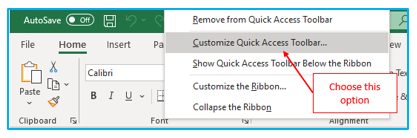
Step 1: If you want to customize the “Quick Access Toolbar”, right-click on any of the ribbon tabs.
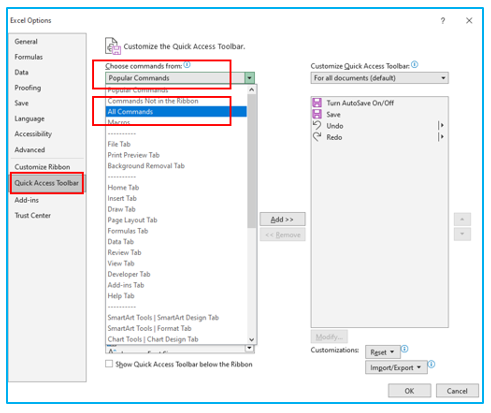
Step 2: In the ‘Choose Command from’ drop-down menu of the “Excel Options” dialogue box, choose “All Command”.
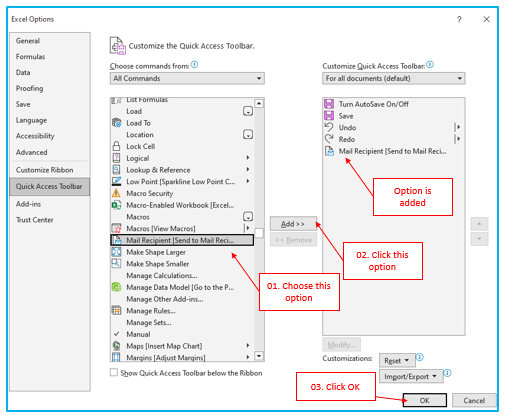
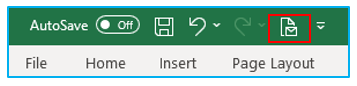
Step 3: The “Send to Mail Recipient” option is located at the bottom of the page. In the latest version, this option may be named “Mail Recipient” (or “Send to Mail Recipient”). Tap the “Add” button. “Send to Mail Recipient” will then be added to the right pane as a result. Choose “Ok.”
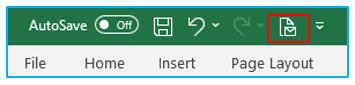
“Mail Recipient [Send to Mail Recipient]” will now be an icon in the “Quick Access Toolbar”.
The following are some actions you can take with this choice:
- Send a section of the worksheet in the body of the email.
- Email only one Excel worksheet as an attachment.
- Send an email attachment containing the complete worksheet.
Using the Send to Mail Recipient option that we added to the Quick Access Toolbar, you can send a section of the worksheet (a group of cells) as the email body.
The following are the steps to email from excel a part of the worksheet as email body:
Step 1: The worksheet from which you want to email a group of cells must be active.
From the “Quick Access Toolbar”, select the “Send of Mail Recipient” icon.
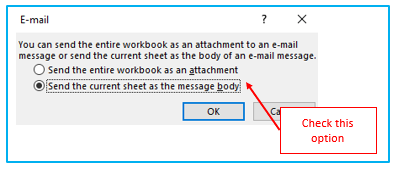
Step 2: Select “Send the current sheet as the message body” and click OK in the ensuing “E-mail” prompt.
The current worksheet will serve as the body of an outgoing email. The worksheet will open immediately in the system’s default email client and be included in the email body.
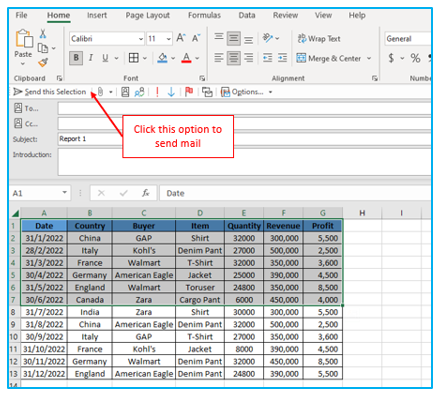
Step 3: Only the selection of cells will be sent in the email body if you choose to select a range of cells. Otherwise, the complete worksheet will be sent. Select “Send.”
The functionality of an Excel worksheet is lost when you utilize the aforementioned way to transmit a portion of the worksheet in the body of an email. This may be useful if you only need to submit a portion of a larger data collection rather than the complete worksheet.
2. Send a Single Excel Worksheet as Email Attachment
One Excel worksheet (out of many in the workbook) might be appropriate to send as an email attachment. You must first create a new workbook with just that one sheet in it, then email it via the Send to Email Recipient option.
The following are the steps to send a single excel worksheet as email attachment:
Step 1: To move or copy a sheet, right-click on it and choose Move or Copy.
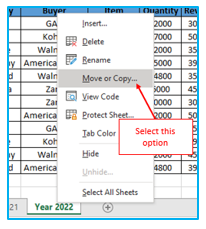
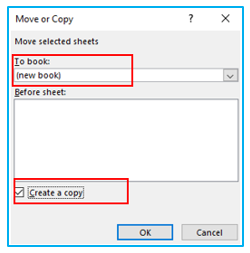
Step 2: Make the (new book) selection in the “To book” drop-down menu of the “Move or Copy” dialogue box. Additionally, select “Create a copy” from the menu in the bottom left.
Step 3: Select OK. By doing this, a new workbook that contains simply the copied worksheet will be produced.

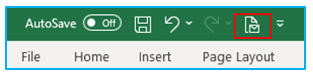
Step 4: Select the icon for Send to Mail Recipient from the Quick Access Toolbar after activating the newly generated worksheet.
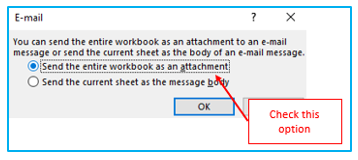
Step 5: Choose the option to “Send the entire workbook as an attachment” in the “E-mail” dialogue box.

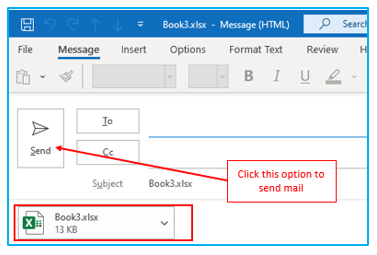
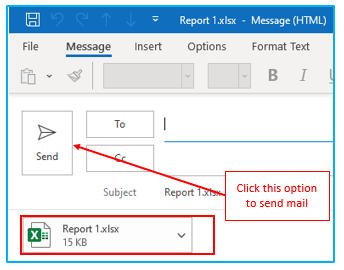
Step 6: Select OK. By pressing here, an outgoing email with the workbook attached will open. You are submitting a single worksheet only since this is the new workbook we constructed and only includes one page (that we transferred). Select “Send.”
3. Send the Entire Workbook as Email Attachment
By including it as an attachment to the email, you may distribute the complete workbook with ease.
How to email entire workbook as email attachment is shown below:
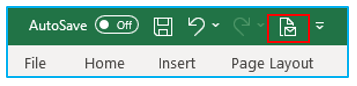
Step 1: From the “Quick Access Toolbar”, select the “Send of Mail Recipient” icon.
Step 2: Choose the option to “Send the entire workbook as an attachment” in the “E-mail” dialogue box.
Step 3: Select OK. By clicking this, an outgoing email with the workbook attached will open. Select “Send.”
While you can complete all of the aforementioned tasks without using the Send to Mail recipient option, doing so does so more quickly and effectively.
Application of Email From Excel Sheet
- Automated Report Distribution:
- Automate the sending of periodic reports like sales, inventory, or performance metrics to team members or stakeholders, ensuring they receive timely updates directly from the source data.
- Alerts and Notifications:
- Set up automatic alerts or notifications based on specific triggers or thresholds in your data, such as inventory levels dropping below a certain point or a project reaching a critical milestone.
- Data Collection and Requests for Information:
- Send out requests for information or data collection forms to colleagues or external partners, making the process of gathering and consolidating information efficient and centralized.
- Invoice or Receipt Dispatch:
- Automatically generate and send invoices, receipts, or financial statements to clients or vendors, directly linking the transaction details from your financial spreadsheets.
- Personalized Marketing or Information Campaigns:
- Use Excel to manage and send personalized marketing campaigns or informational updates, tailoring the content of the emails based on the data stored for each recipient in the sheet.
- Feedback and Survey Invitations:
- Distribute surveys, feedback forms, or invitations to events, leveraging the contact information and other relevant details stored in your Excel sheet to reach the intended audience effectively.
Using Excel to send emails directly can significantly streamline communication processes, ensuring that data-driven messages are delivered accurately and efficiently.
For ready to use Dashboard Templates:
