How to Delete Hidden Rows in Excel?
Delete Hidden Rows in Excel, your trusty data tidying companion, empowers you to maintain the utmost precision and clarity within your spreadsheets. This essential function goes beyond mere data management; it ensures that your Excel workbooks are a testament to efficiency and professionalism. With ‘Delete Hidden Rows in Excel,’ you can bid farewell to cluttered datasets, confidently share sensitive information, and optimize your workbook’s performance. Whether you’re preparing data for analysis, safeguarding privacy, or simply striving for a cleaner and more streamlined presentation, this feature is your key to achieving a polished and well-organized Microsoft Excel experience. Embrace the simplicity and impact of ‘Delete Hidden Rows in Excel,’ making your data work for you with unmatched precision and efficiency.
This Tutorial Covers:
- In Excel, remove all hidden rows and columns.
- Using VBA, remove Hidden Rows and Columns
- Using the Whole Worksheet (Used Range)
- Specifically, from a Range of Cells
1. Remove all hidden rows and columns in Excel
The technique described here can be used to remove all of the hidden rows and columns from a worksheet in Excel.
Keep in mind that the entire workbook, not just the current sheet, will have these hidden rows and columns removed.
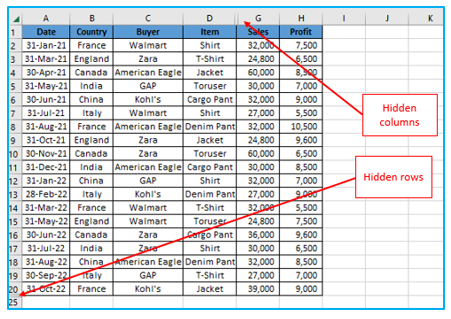
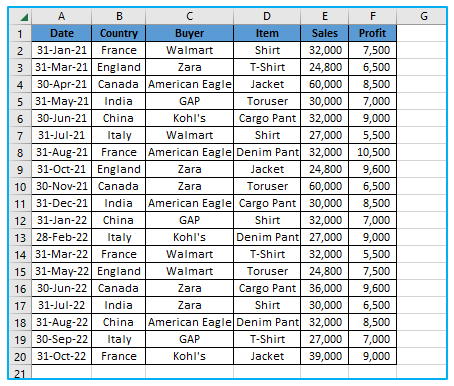
Suppose you have a dataset with hidden rows and columns like below. If you want to delete hidden rows in Excel, then follow the instructions.
The Excel workbook’s hidden rows and columns can be removed by following the methods listed below:
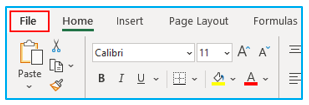
Step 1: Select File from the menu.
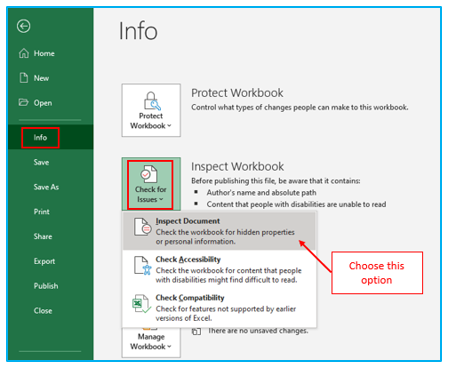
Step 2: Select “Info” from the menu on the left. Select “Check for Issues” from the menu. Select “Inspect Document” from the menu. With this, the “Document Inspector” dialog box will be displayed.
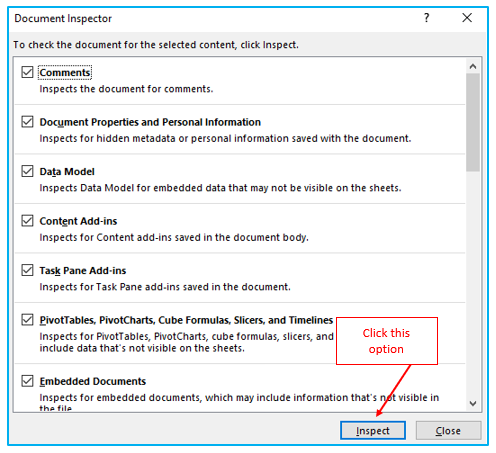
Step 3: Select “Inspect” from the menu options in the “Document Inspector” dialog box. This will look over the entire workbook and provide you with details about it.
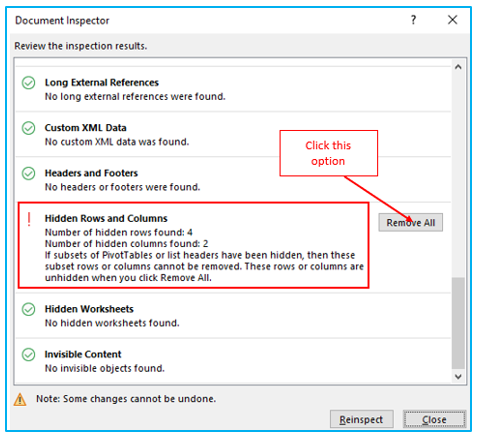
Step 4: Look for the “Hidden Rows and Columns” option as you descend. You’ll observe that it displays the overall number of hidden columns and rows it has uncovered in the workbook. Select “Remove All” from the menu.
All the hidden rows and columns in the workbook would be deleted by the aforementioned methods.
Before using the Document Inspector option, keep in mind that you must save this workbook. If the workbook hasn’t been saved yet, Excel will first force you to do so. Additionally, a popup requiring you to save the file once will appear, as the data altered by these actions cannot be reversed.

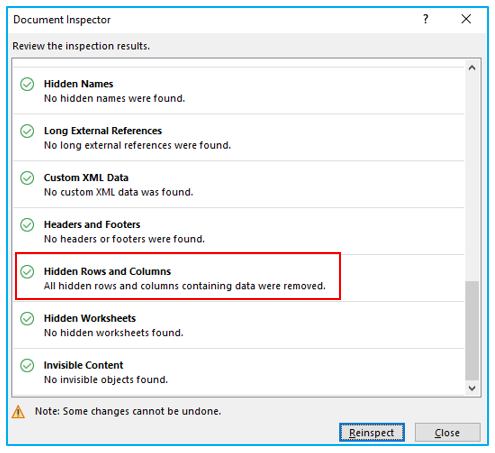
You would notice a green check before the Hidden and Rows and Columns option if there were no hidden rows and columns (in the Document Inspector dialog box).
The result looks like below.
The Document Inspector dialog box also provides you with a wealth of additional helpful information, like the number of comments, hidden worksheets, embedded documents, etc., in addition to hidden rows and columns.
Note: The modifications performed by the Document Inspector cannot be reversed. As a result, be sure to copy and paste in a suitable place for backup.
If you wish to remove all of the workbook’s hidden columns and rows, this is a perfect technique.
You cannot utilize this option, though, if all you want to do is remove it from a certain sheet or a specific range.
If so, you can employ the VBA technique that is discussed next.
2. Using VBA, delete all Hidden Rows and Columns:
You can manually unhide the few rows and columns that are hidden before deleting the data if there aren’t many.
However, it’s recommended to utilize VBA macro scripts to automate this procedure if you need to do it frequently or if you have a huge data collection with a lot of hidden rows and columns.
Let’s examine various situations when you can erase these concealed rows and columns using VBA.
- Using the Whole Worksheet (Used Range):
Even if I could instruct the VBA code to examine the entire worksheet beginning with the final row and column numbers, that would be a waste of time and resources.
A better approach would be to identify the used range before just checking it for any concealed columns and rows.
The VBA code that would eliminate every hidden row in the selected range is shown below:
Sub DeleteHiddenRows()
Dim sht As Worksheet
Dim LastRow
Set sht = ActiveSheet
LastRow = sht.UsedRange.Rows(sht.UsedRange.Rows.Count).Row
For i = LastRow To 1 Step -1
If Rows(i).Hidden = True Then Rows(i).EntireRow.Delete
Next
End Sub
Before assigning the row number to the variable “LastRow,” the aforementioned VBA code first determines the last row number in the used range.
Then, starting with the last row and determining whether it is concealed or not, the last row number is used in a for-next loop.
That entire row gets removed just in case it was hidden. In the event that it is not concealed, the code leaves that row in place before moving to the row above it. This loop searches over every row and eliminates any hidden rows it finds.
Use the VBA code below if you wish to remove all the hidden columns from the currently selected range:
Sub DeleteHiddenColumns()
Dim sht As Worksheet
Dim LastCol as Integer
Set sht = ActiveSheet
LastCol = sht.UsedRange.Columns(sht.UsedRange.Columns.Count).Column
For i = LastCol To 1 Step -1
If Columns(i).Hidden = True Then Columns(i).EntireColumn.Delete
Next
End Sub
Again, this operates in the same manner, except that we are looking for columns rather than rows.
In order to delete all concealed columns, it first determines the final column number in the used range, assigns it to a variable, and then uses the loop to move from the last column to the first column.
Use the VBA code below if you’d want to have a code that would remove all concealed rows and columns:
Sub DeleteHiddenRowsColumns()
Dim sht As Worksheet
Dim LastRow as Integer
Dim LastCol as Integer
Set sht = ActiveSheet
LastRow = sht.UsedRange.Rows(sht.UsedRange.Rows.Count).Row
LastCol = sht.UsedRange.Columns(sht.UsedRange.Columns.Count).Column
For i = LastRow To 1 Step -1
If Rows(i).Hidden = True Then Rows(i).EntireRow.Delete
Next
For i = LastCol To 1 Step -1
If Columns(i).Hidden = True Then Columns(i).EntireColumn.Delete
Next
End Sub
Simply the combined code that applies to both rows and columns, it functions in the same way.
This uses two independent loops in place of one, first iterating through all the rows, then all the columns. Additionally, as it goes along, it eliminates any hidden columns and rows that it comes across.
Note: This VBA code must be put in a standard module in the Visual Basic Editor. The code can then be executed directly from the Visual Basic Editor, using the macro dialog box, or by including this macro in the Quick Action Template.
You may also add this code to the personal macro worksheet if you need to do it frequently so that you can access it from any workbook on your system.
- Specifically, from a Range of Cells:
If you wish to remove hidden rows and columns from a particular range, you must indicate it in the code.
This ensures that only the rows and columns in that given range are circled by the code, leaving the rest of the worksheet’s sections unaffected.
The VBA code that would cause this is below:
Sub DeleteHiddenRowsColumns()
Dim sht As Worksheet
Dim Rng As Range
Dim LastRow As Integer
Dim RowCount As Integer
Set sht = ActiveSheet
Set Rng = Range(“A1:K200”)
RowCount = Rng.Rows.Count
LastRow = Rng.Rows(Rng.Rows.Count).Row
ColCount = Rng.Columns.Count
LastCol = Rng.Columns(Rng.Columns.Count).Column
For i = LastRow To LastRow – RowCount Step -1
If Rows(i).Hidden = True Then Rows(i).EntireRow.Delete
Next
For j = LastCol To LastCol – ColCount Step -1
If Columns(j).Hidden = True Then Columns(j).EntireColumn.Delete
Next
End Sub
I have defined the range as A1:K200 in the code above.
This instructs the code to search through every row and every column in the designated range and delete any hidden rows and columns it finds.
Any concealed rows or columns that are outside of this range would be unaffected.
Therefore, this is how you can remove Excel’s hidden rows and columns.
Use the Document Inspector option if you wish to apply it to the entire worksheet. Additionally, you can use the VBA codes as previously displayed if you require greater control.
Remove hidden data in Excel Worksheet
To remove hidden data in Excel, you can use the “Document Inspector” feature, which helps in identifying and deleting hidden and personal information that might be stored in the workbook. Here’s how to do it:
- Open your Excel workbook and click on the “File” tab.
- Click on “Info” and then select “Check for Issues”.
- Choose “Inspect Document” from the dropdown menu. This will open the Document Inspector.
- In the Document Inspector window, check the boxes for the types of hidden content you want to inspect, such as “Comments and Annotations,” “Hidden Rows and Columns,” or “Invisible Content”.
- Click “Inspect” to begin the search for hidden data.
- Once the inspection is complete, click “Remove All” next to each category of hidden data you want to delete.
This process will help you clean up your Excel document by removing potentially sensitive or unnecessary hidden data.
Application of Delete Hidden Rows in Excel
- Data Cleaning:
- Remove hidden rows to clean up datasets and eliminate unnecessary or filtered-out data, ensuring accurate analysis.
- Improved Readability:
- Delete hidden rows to enhance spreadsheet readability, making it easier to navigate and understand complex data.
- Reducing File Size:
- Eliminate hidden rows to reduce the file size of your Excel workbook, optimizing performance and storage space.
- Privacy and Data Security:
- Delete hidden rows containing sensitive information to maintain data privacy and security, especially when sharing workbooks.
- Data Export:
- Prepare data for export or sharing by removing hidden rows, ensuring that only relevant information is included.
- Efficient Printing:
- Delete hidden rows before printing to create cleaner and more focused hard copies of your Excel worksheets.
Deleting hidden rows in Excel streamlines data management and enhances the usability and security of your spreadsheets, making it a valuable tool for various tasks and scenarios.
For ready-to-use Dashboard Templates:
