How to spell check in excel? Check spelling – 2 Easy Methods.
Spell check in Excel to ensure your spreadsheets are not only numerically accurate but also linguistically polished. This feature is essential for maintaining professionalism, preventing miscommunications, and preserving the credibility of your data presentations. Whether you’re drafting financial reports, compiling research data, or creating inventory lists, having error-free text is crucial. This guide will navigate you through the process of using Excel’s spell check feature, helping you to identify and correct typos, grammatical mistakes, and inconsistencies in your text. By mastering this functionality, you’ll elevate the quality of your spreadsheets, making them more reliable and effective communication tools.
Spell check in excel from menu tab
By following a few simple steps, we can spell check in the Excel.
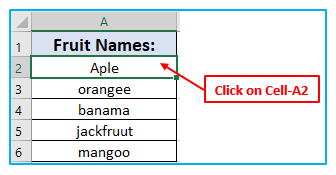
Step 1: Select the cells to spell-check.
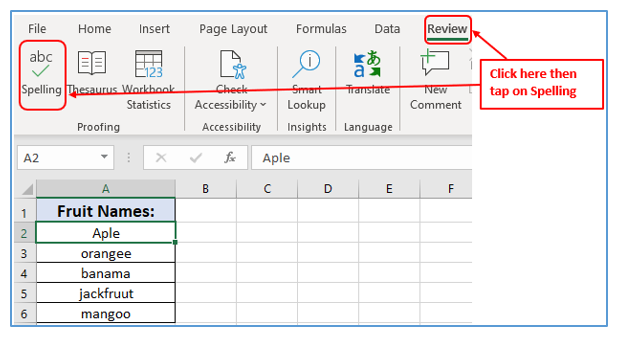
Step 2: Click Spelling on the Review tab, under the Proofing group. The Spell Check dialog box opens.
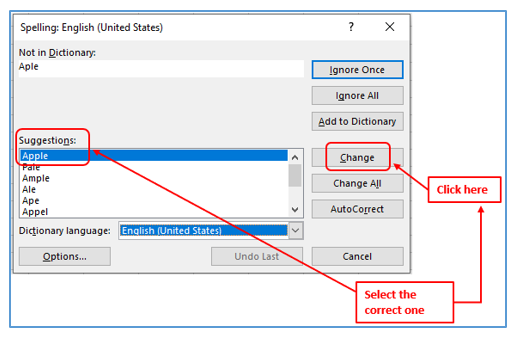
Step 3: To correct a mistake, select an appropriate option from Suggestions and click the Change button.
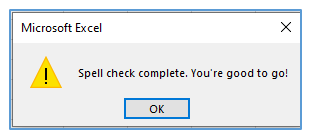
Step 4: When the spell check is completed, Excel will display the corresponding message. Click OK.
Keyboard Shortcut to Run Check Spelling in Excel
Simply choose the single cell from which you want to begin checking, and then on your keyboard, press the F7 key.
Features of Spell Check Window in Excel / Understanding the Spell Check Dialogue Box
When we perform spell check in Excel, a Spelling dialogue box with certain options appears. The spell check dialog box looks like this:
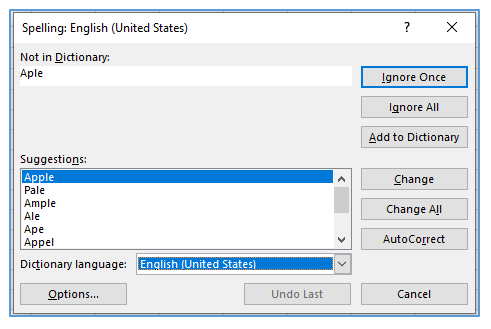
We have the following options in the image above:
Ignore Once: If we want to keep the selected cell unchanged and move the cursor to the next cell of the matching word, we must click the ‘Ignore Once’ button.
Ignore All: Once Excel detects and marks a specific term as an error, and the word appears numerous times inside the sheet, yet you wish to retain all of the instances the same, then must click the ‘Ignore All’ box.
Add to Dictionary: Click ‘Add to Dictionary’ to add the current word to the dictionary. This ensures that the same term is not recognized as an error the next time you spell check.
Change: When you select this option, the suggested word replaces the misspelled word.
Change All: Click ‘Change All’ to replace all mistakes similar to the current one with the selected suggestion.
AutoCorrect: Click ‘AutoCorrect’ to let Excel rectify the error as it sees fit. If you type the same misspelled word again, Excel will automatically convert it to the suggestion you choose.
Not in dictionary: It displays the spelling mistake that does not exist in the Excel dictionary.
Suggestions: When Excel discovers incorrect or wrong spellings, it displays several relevant ones as replacements in the ‘Suggestions’ section. You can choose any of the terms from the list.
Dictionary Language: Using this drop down, you may change the dictionary language.
Options…: Click the ‘Options…’ button to view or adjust the spell check settings.
Cancel: Click the ‘Cancel’ button to end the correction procedure and close the dialog.
H2: Advanced Spell Check Features in Excel
H3: Utilizing the Autocorrect Function to Prevent Typos
How to AutoCorrect in Excel?
Excel AutoCorrect is intended to automatically fix misspelled words as you type.
The following are the steps for customizing the AutoCorrect feature:
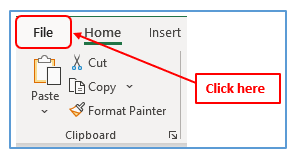
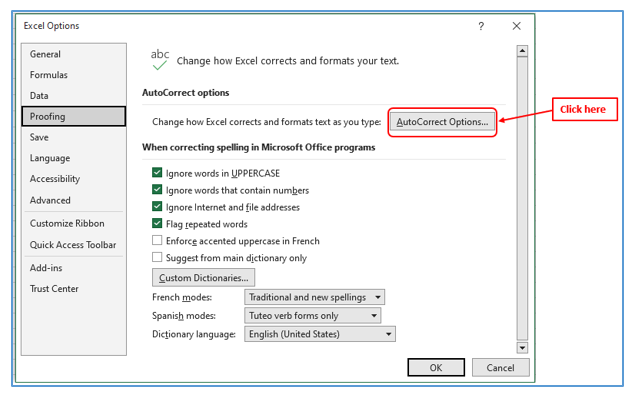
Step 1: On the Excel ribbon, select the File tab.
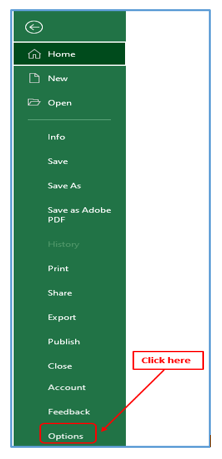
Step 2: Tap on the “Options.”
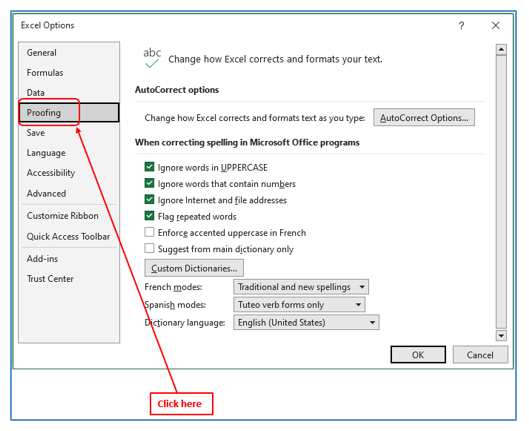
Step 3: Click Proofing in the Excel Options dialog box.
Step 4: Select ‘Autocorrect Options’ from the Proofing menu.
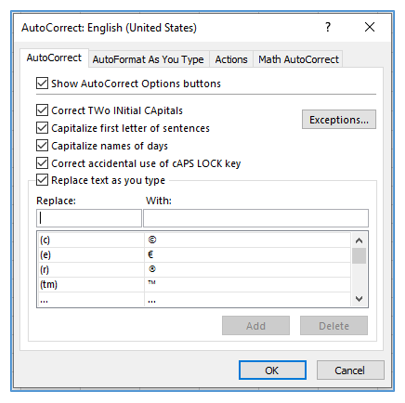
Step 5: The “AutoCorrect” dialog box appears.
Step 6: Fill in the “replace” box with the words that need to be replaced. And type the correct words in the ‘With’ box.
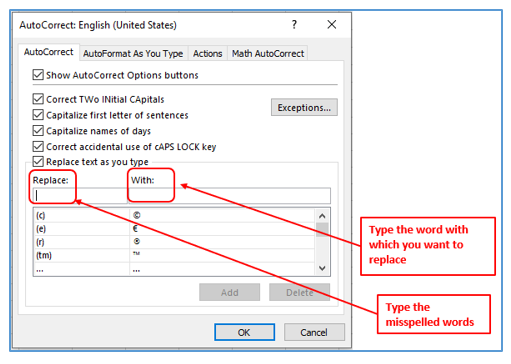
Excel is asked to replace faulty spellings (in the “replace” box) with proper spellings (in the “with” box).
Please keep in mind that the “AutoCorrect” panel already displays the most common misspellings and associated corrections that are utilized by default. This list’s entries can be changed, added to, or deleted.
Understanding the Autocorrect Options Tab
Some options in the Autocorrect Options tab are enabled by default and solve some frequent issues.
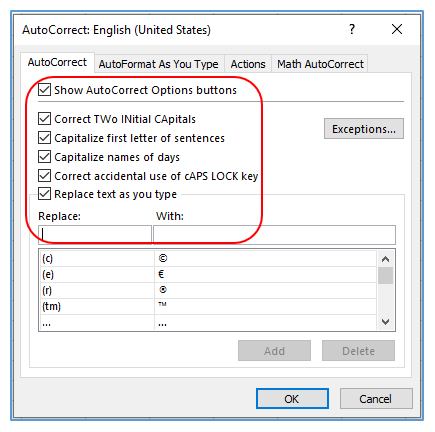
We have the following options in the image above:
Show Autocorrect Options buttons: This one isn’t applicable to Excel, but it is for other Microsoft products. When you enable this option, the autocorrect options in MS Word or MS PowerPoint appear.
Correct two initial capitals: Lowercases the second capital letter. Example, when you type ‘APple,’ this will convert into ‘Apple,’ automatically.
Capitalize first letter of sentences: After a period (full stop), capitalizes the first letter. Example, when you type ‘Apple. orange.’ this will convert into ‘Apple. Orange.’ automatically.
Capitalize names of days: Change the first letter of the day name. Example, friday will convert into ‘Friday.’ automatically.
Correct accidental use of Caps lock key: Fixes words with the initial letter in lowercase and the others in uppercase. Example, ‘aPPle’ will convert into ‘Apple.’ automatically.
Replace text as you type: Excel already includes several often-misspelled words here. When you type (e), for example, it is instantly turned into ‘€’. This is due to it being listed in the list in this option. You get the option of adding or removing words from the list.
Adding Custom Words to Your Dictionary
During the spell check process, Excel might flag specialized terms or names that are not recognized by the default dictionary. In such cases, the “Add to Dictionary” option allows users to customize the dictionary by incorporating these terms, ensuring they are not identified as errors in subsequent checks. This feature is particularly useful for users working in specialized fields with unique terminologies or in creating documents that frequently use brand names or technical terms. By building a personalized dictionary, Microsoft Excel becomes more adept at recognizing and accepting your specific language use, further enhancing the Excel checks function’s effectiveness and efficiency.
How to Run Spell Check on the Entire Workbook
To maintain consistency and professionalism across an entire Excel workbook, running a spell check on all sheets is essential. This can be achieved by selecting the first sheet of your workbook, initiating the spell check via the Review tab or pressing F7, and then choosing to continue checking at the beginning of the workbook when prompted. This process ensures that Excel scans every cell across all sheets, flagging spelling errors and allowing for correction. It’s an effective way to ensure that every part of your workbook, from data entries to comments and formulas, is free from spelling errors, contributing to a more polished and reliable document.
Check Individual Cells and Ranges
For targeted spell check operations, such as reviewing a specific section of your data or a particular dataset, Excel allows for spelling checks on individual cells or selected ranges. This is particularly useful for documents that are frequently updated or when new data is added that requires verification. To check spelling in a specific area, select the cell or highlight the range of cells you wish to check. Then, either go to the ‘Review’ tab and click on ‘Spelling’ or press the F7 key. Excel will focus the spell check process only on the selected cells or range, providing suggestions for corrections where necessary. This method is efficient for focusing your efforts on parts of the workbook that are most critical or have recently been modified, ensuring high levels of accuracy where it matters most.
Spell Checking Multiple Sheets Within a Workbook
In scenarios where you need to ensure spelling consistency and accuracy across multiple, but not all, sheets within a workbook, Excel’s spell check can be adapted to this need. Although Excel does not natively allow you to select non-adjacent sheets for a collective spell check, you can work around this limitation by temporarily grouping the sheets you wish to check. To do this, hold down the Ctrl key and click on each sheet tab you want to include in your spell check. With the sheets selected, press F7 or go to the ‘Review’ tab and select ‘Spelling’. Excel will then run the spell check across all selected sheets in sequence. Remember to ungroup your sheets after completing the spell check to avoid unintentionally editing multiple cells or sheets simultaneously. This method ensures that your critical data across various parts of the workbook is accurate and professionally presented, without the need to check every sheet in cases where it’s not necessary.
Troubleshooting Common Spell Check Issues in Excel
Addressing Excel Spell Check Not Working
When Excel’s spell check isn’t working, it could be due to several factors, such as the feature being disabled in the settings, the cells being formatted as something other than text, or the language settings not matching the text in your workbook. To address this, first, ensure that spell check is enabled in Excel’s options under the Proofing section. Next, check the cell formatting to make sure it’s set to ‘General’ or ‘Text’, allowing Excel to recognize and check the spelling of the content. Also, verify that the language settings correspond to the language used in your workbook. If Excel still doesn’t check spelling in cells, it may be because the cells contain formulas or are formatted in a way that Excel doesn’t recognize as text. In such cases, copying the text to a text editor, performing the spell check there, and then copying it back into Excel can be a workaround.
Overcoming Limitations of Excel’s Spell Check
Excel’s spell check, unlike MS Word, doesn’t automatically highlight misspelled words as you type and doesn’t check spelling in cells containing formulas or numerical data unless specifically told to do so. To work around these limitations, familiarize yourself with running manual spell checks regularly, especially after significant data entry or updates to your workbook. Additionally, consider using the autocorrect feature to handle common typos and errors automatically. For cells with mixed content (text and numbers), manually selecting the text portion and running the spell check can ensure that spelling errors are caught. Remember, Excel also ignores words that contain numbers and symbols, so for critical documents, double-checking manually or using external proofreading software might be necessary. Also be sure to check for spelling errors in the footer, formula bar, and for repeated words.
Enhancing Your Productivity with Excel’s Spell Check
Tips for Efficient Spell Checking Across Your Workbook
To maximize productivity with Excel’s spell check, incorporate regular spell checks into your workflow, especially before finalizing reports or presentations. Utilize the F7 keyboard shortcut to quickly initiate spell checks without navigating through menus. For workbooks with extensive textual content, breaking down the spell check process into sections (by entire worksheets or selected ranges) can make the task more manageable and ensure thoroughness. Leveraging the ‘Add to Dictionary’ feature for specialized terminology will streamline future spell checks, making them faster and more accurate. Additionally, adjust the autocorrect settings to handle recurrent mistakes automatically, saving time on corrections and maintaining consistency across your document.
How to Ensure Consistent Spelling Across Multiple Excel Files
Maintaining consistent spelling across multiple Excel files requires a proactive and organized approach. Utilize a shared custom dictionary among all your Excel files by configuring it through the Proofing settings, ensuring that specialized terminology is consistently recognized across documents. When working on related projects, keep a glossary of terms and names specific to your project or industry, and periodically update your Excel dictionary to reflect any additions. This practice not only aids in maintaining consistency but also helps in familiarizing new team members with the project’s terminology. For collaborative environments, encourage or mandate regular spell checks before sharing documents internally or externally, reinforcing the habit of maintaining error-free work. Lastly, consider using shared templates with predefined autocorrect settings for common project-related terms to further enhance consistency and efficiency across team members’ work.
For ready-to-use Dashboard Templates:
